

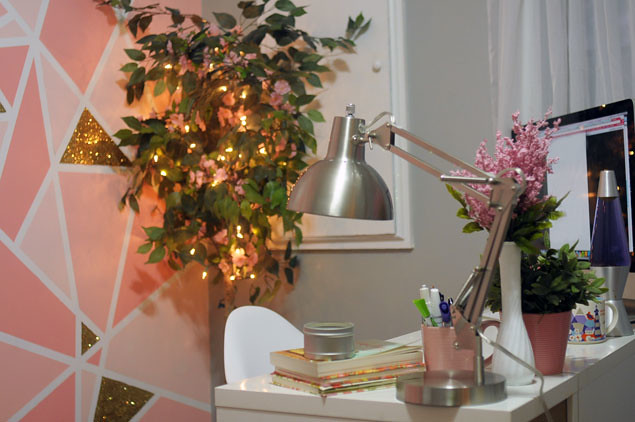
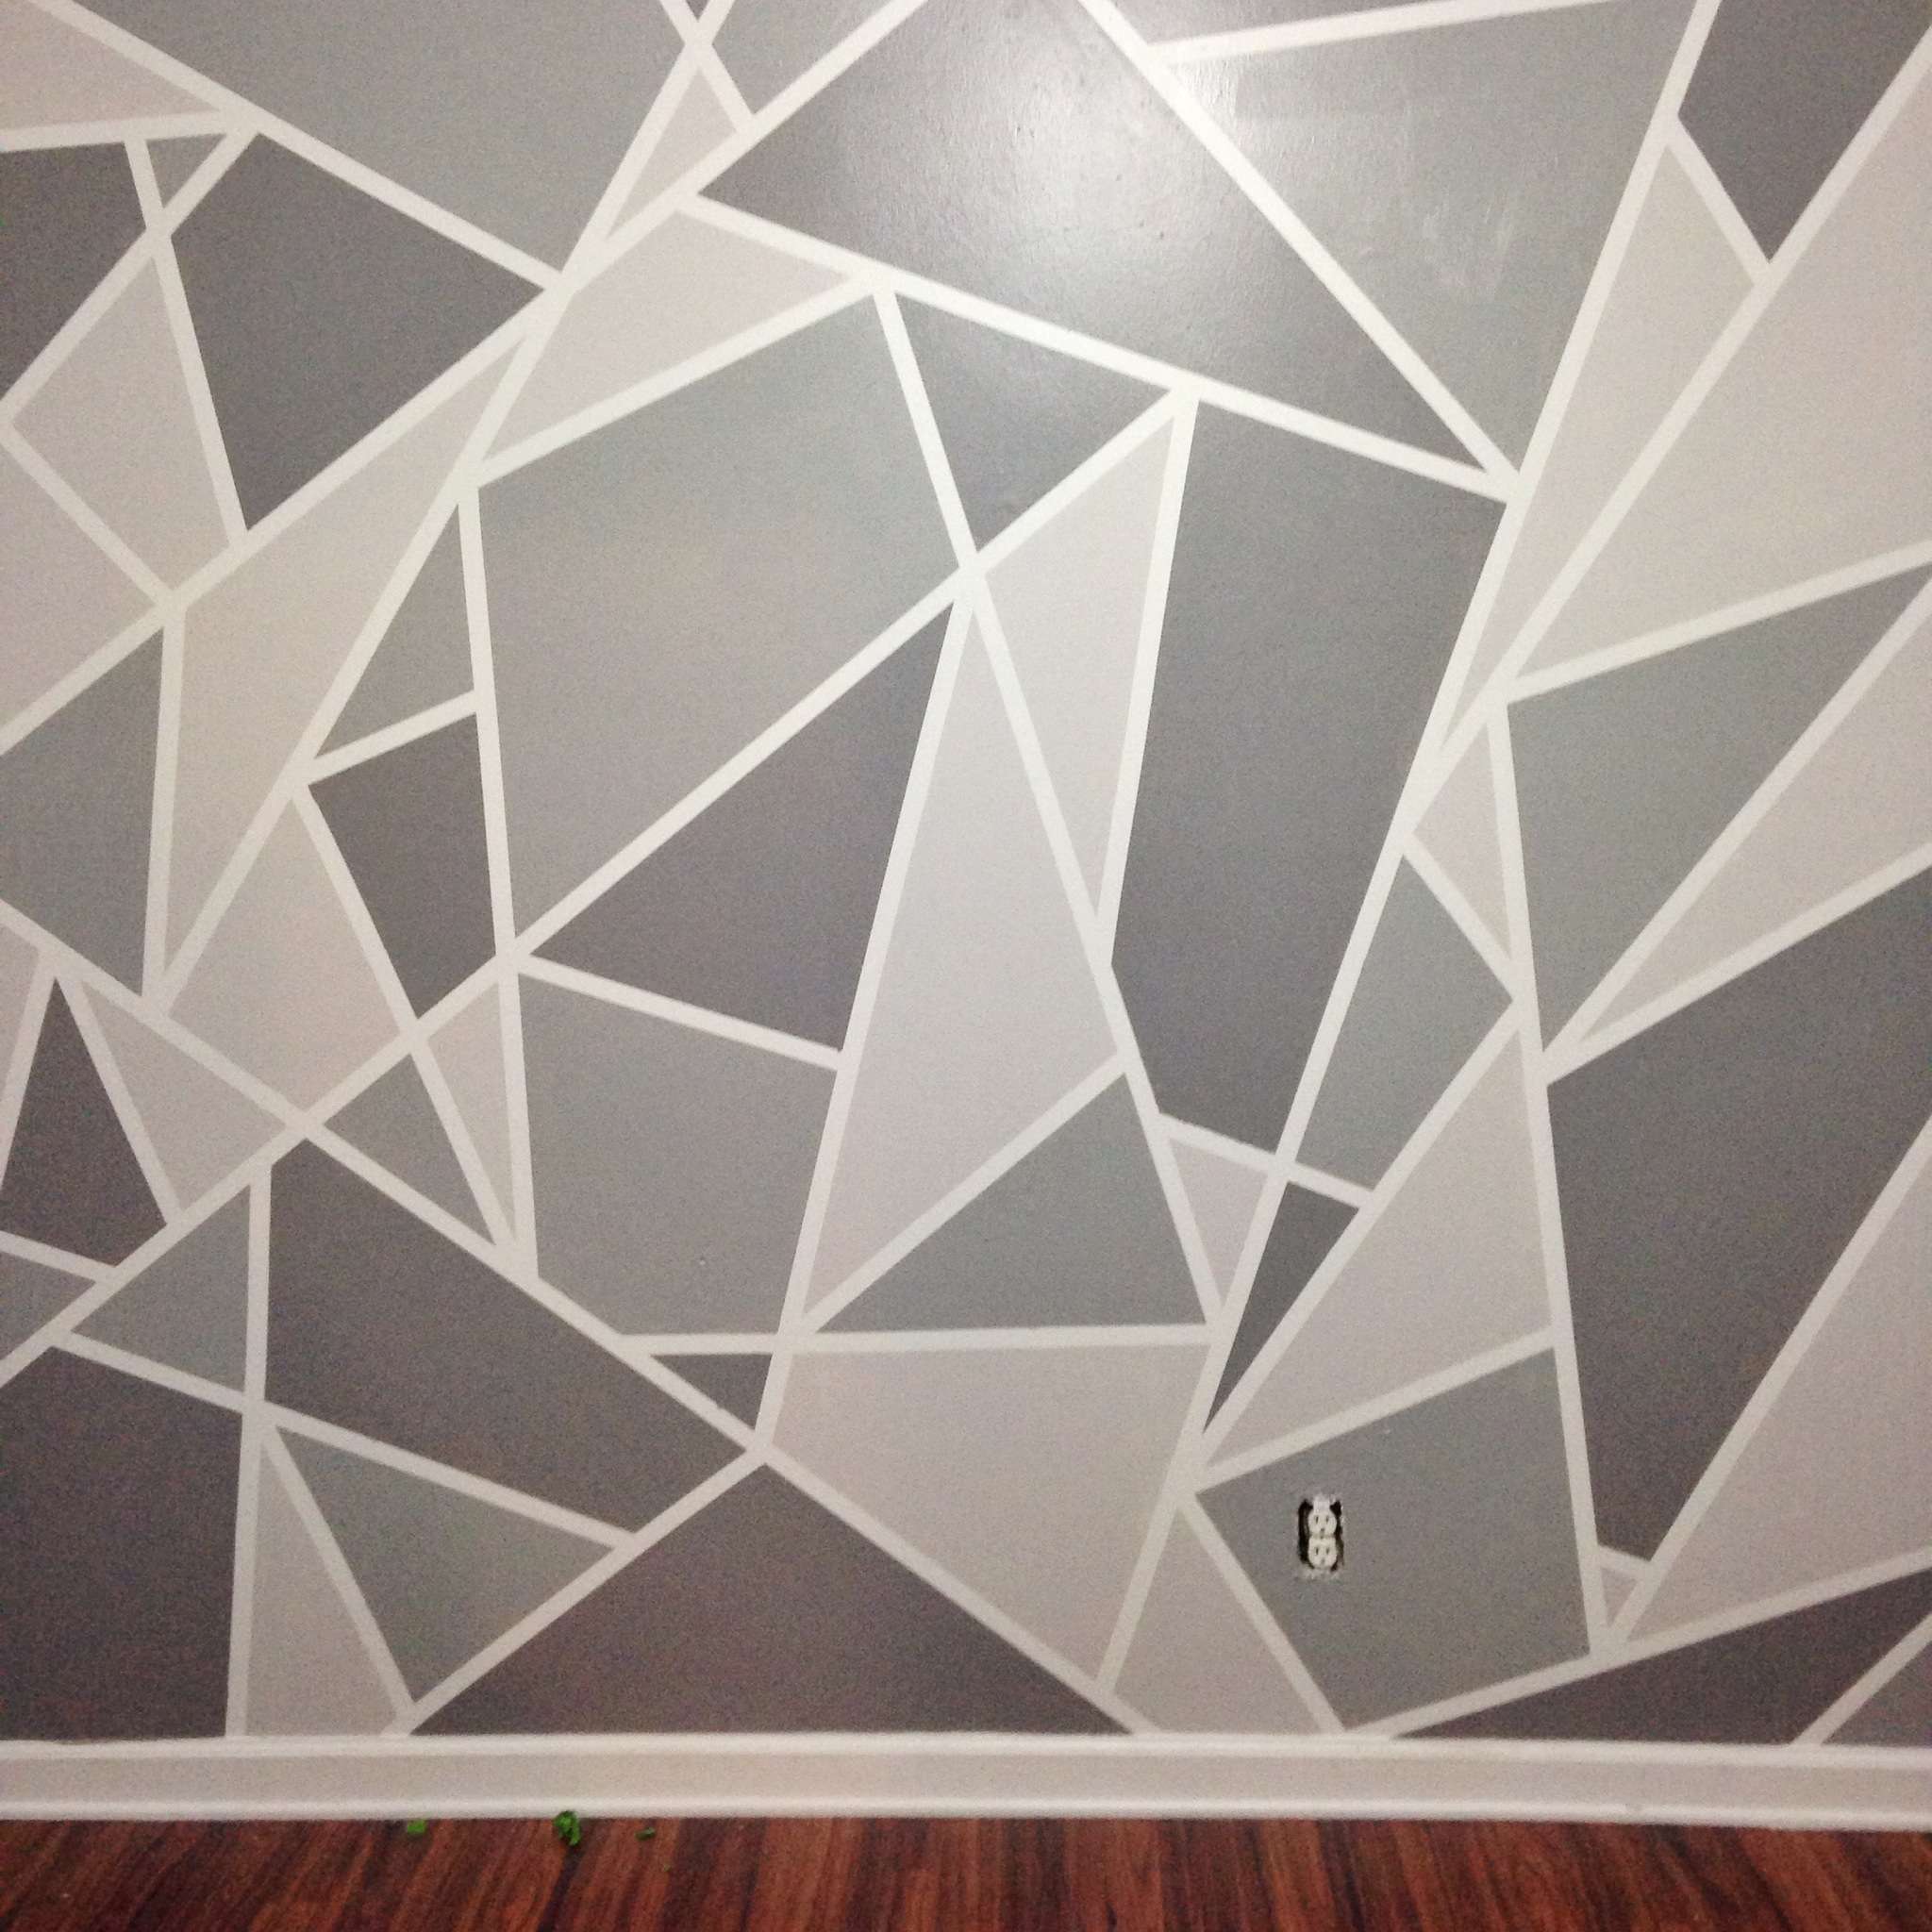
We finally said goodbye to our gorgeous, glittery and pink geometric wall last week. If Baby Flynn had been a girl, we would have undoubtedly kept it. But even since we're bringing a little dude into the world, we couldn't really part with the fun look and feel of a mosaic wall. Rather than scrap the idea all together, we decided to channel the nursery theme around a much more subtle and masculine geometric design. The best part? This project is so budget friendly. The whole thing cost us less than $20!

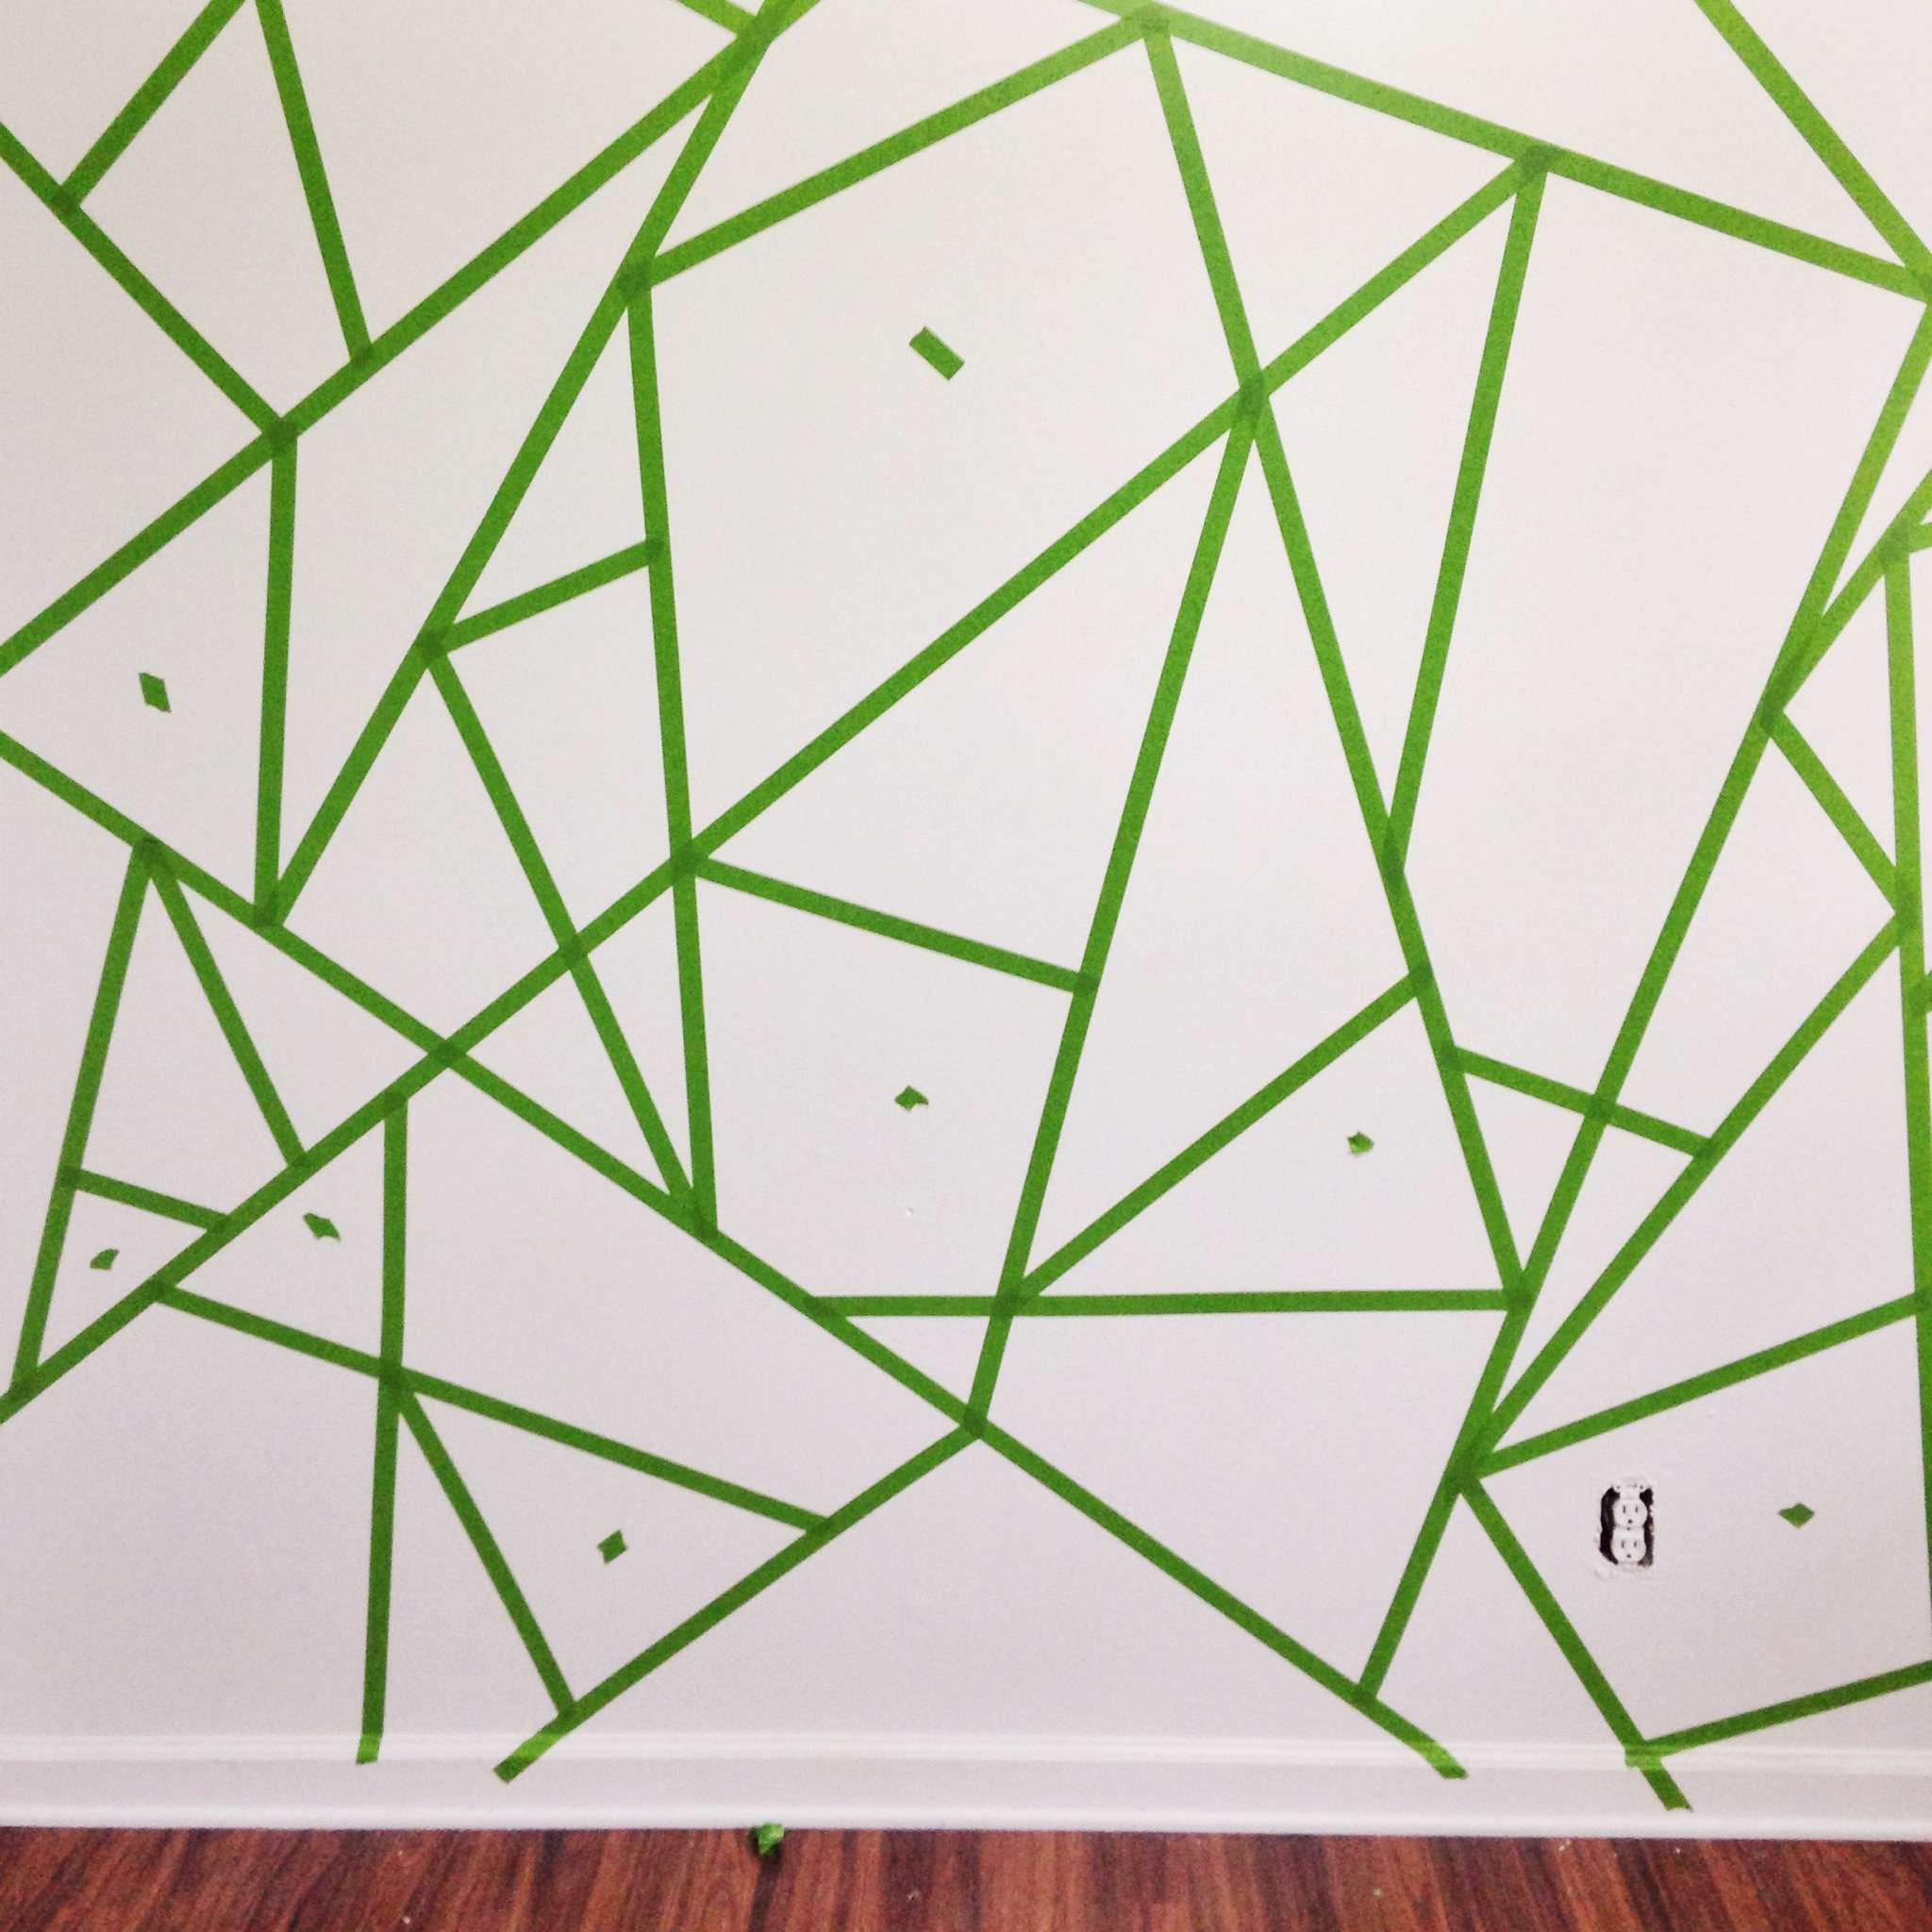
Now, I've received a lot of questions about how we got the glitter off the original wall, and I'm happy to report it was much easier than we expected! It still took some elbow grease, but a spritzing bottle of warm, soapy water and a putty knife did the trick. After we got all of the glitter off the wall and then off the floor, Mike painted over the pink design with Kilz primer. I busied myself elsewhere for that portion since the fumes are pretty tough. After that he threw down a layer of satin white so the lines would match the finish of the geometrics, and then it was time to tape! If you remember from our original wall, we used regular FrogTape in the .94" size. Last time we had some issues of it rolling up on us, but this time around was perfect! We seriously couldn't have asked for better lines.
I've also been asked a few times if there's a rhyme or reason to the way we tape the shapes. The simple answer: Nope! The longer answer: We try to do the longer/larger lines first, to sort of set the stage on the wall. Then we break those down into smaller lines. We put more time and effort into the execution this time around, but I think both walls turned out great (I'm totally biased). We didn't use any glitter this time since I didn't want it to get stuck all over everything in the nursery, but we'll be adding some extra color to the room with the accessories.

If you're still interested in giving a geo wall a whirl, here are a few tips and tricks I'd recommend employing in order to help you get the best results:
- Run your fingers over either side of the tape after you put it down. This will push out any wrinkles or bubbles that might have formed while placing. If you don't do this, you run the risk of getting paint caught under them and then ruining your crisp, white line.
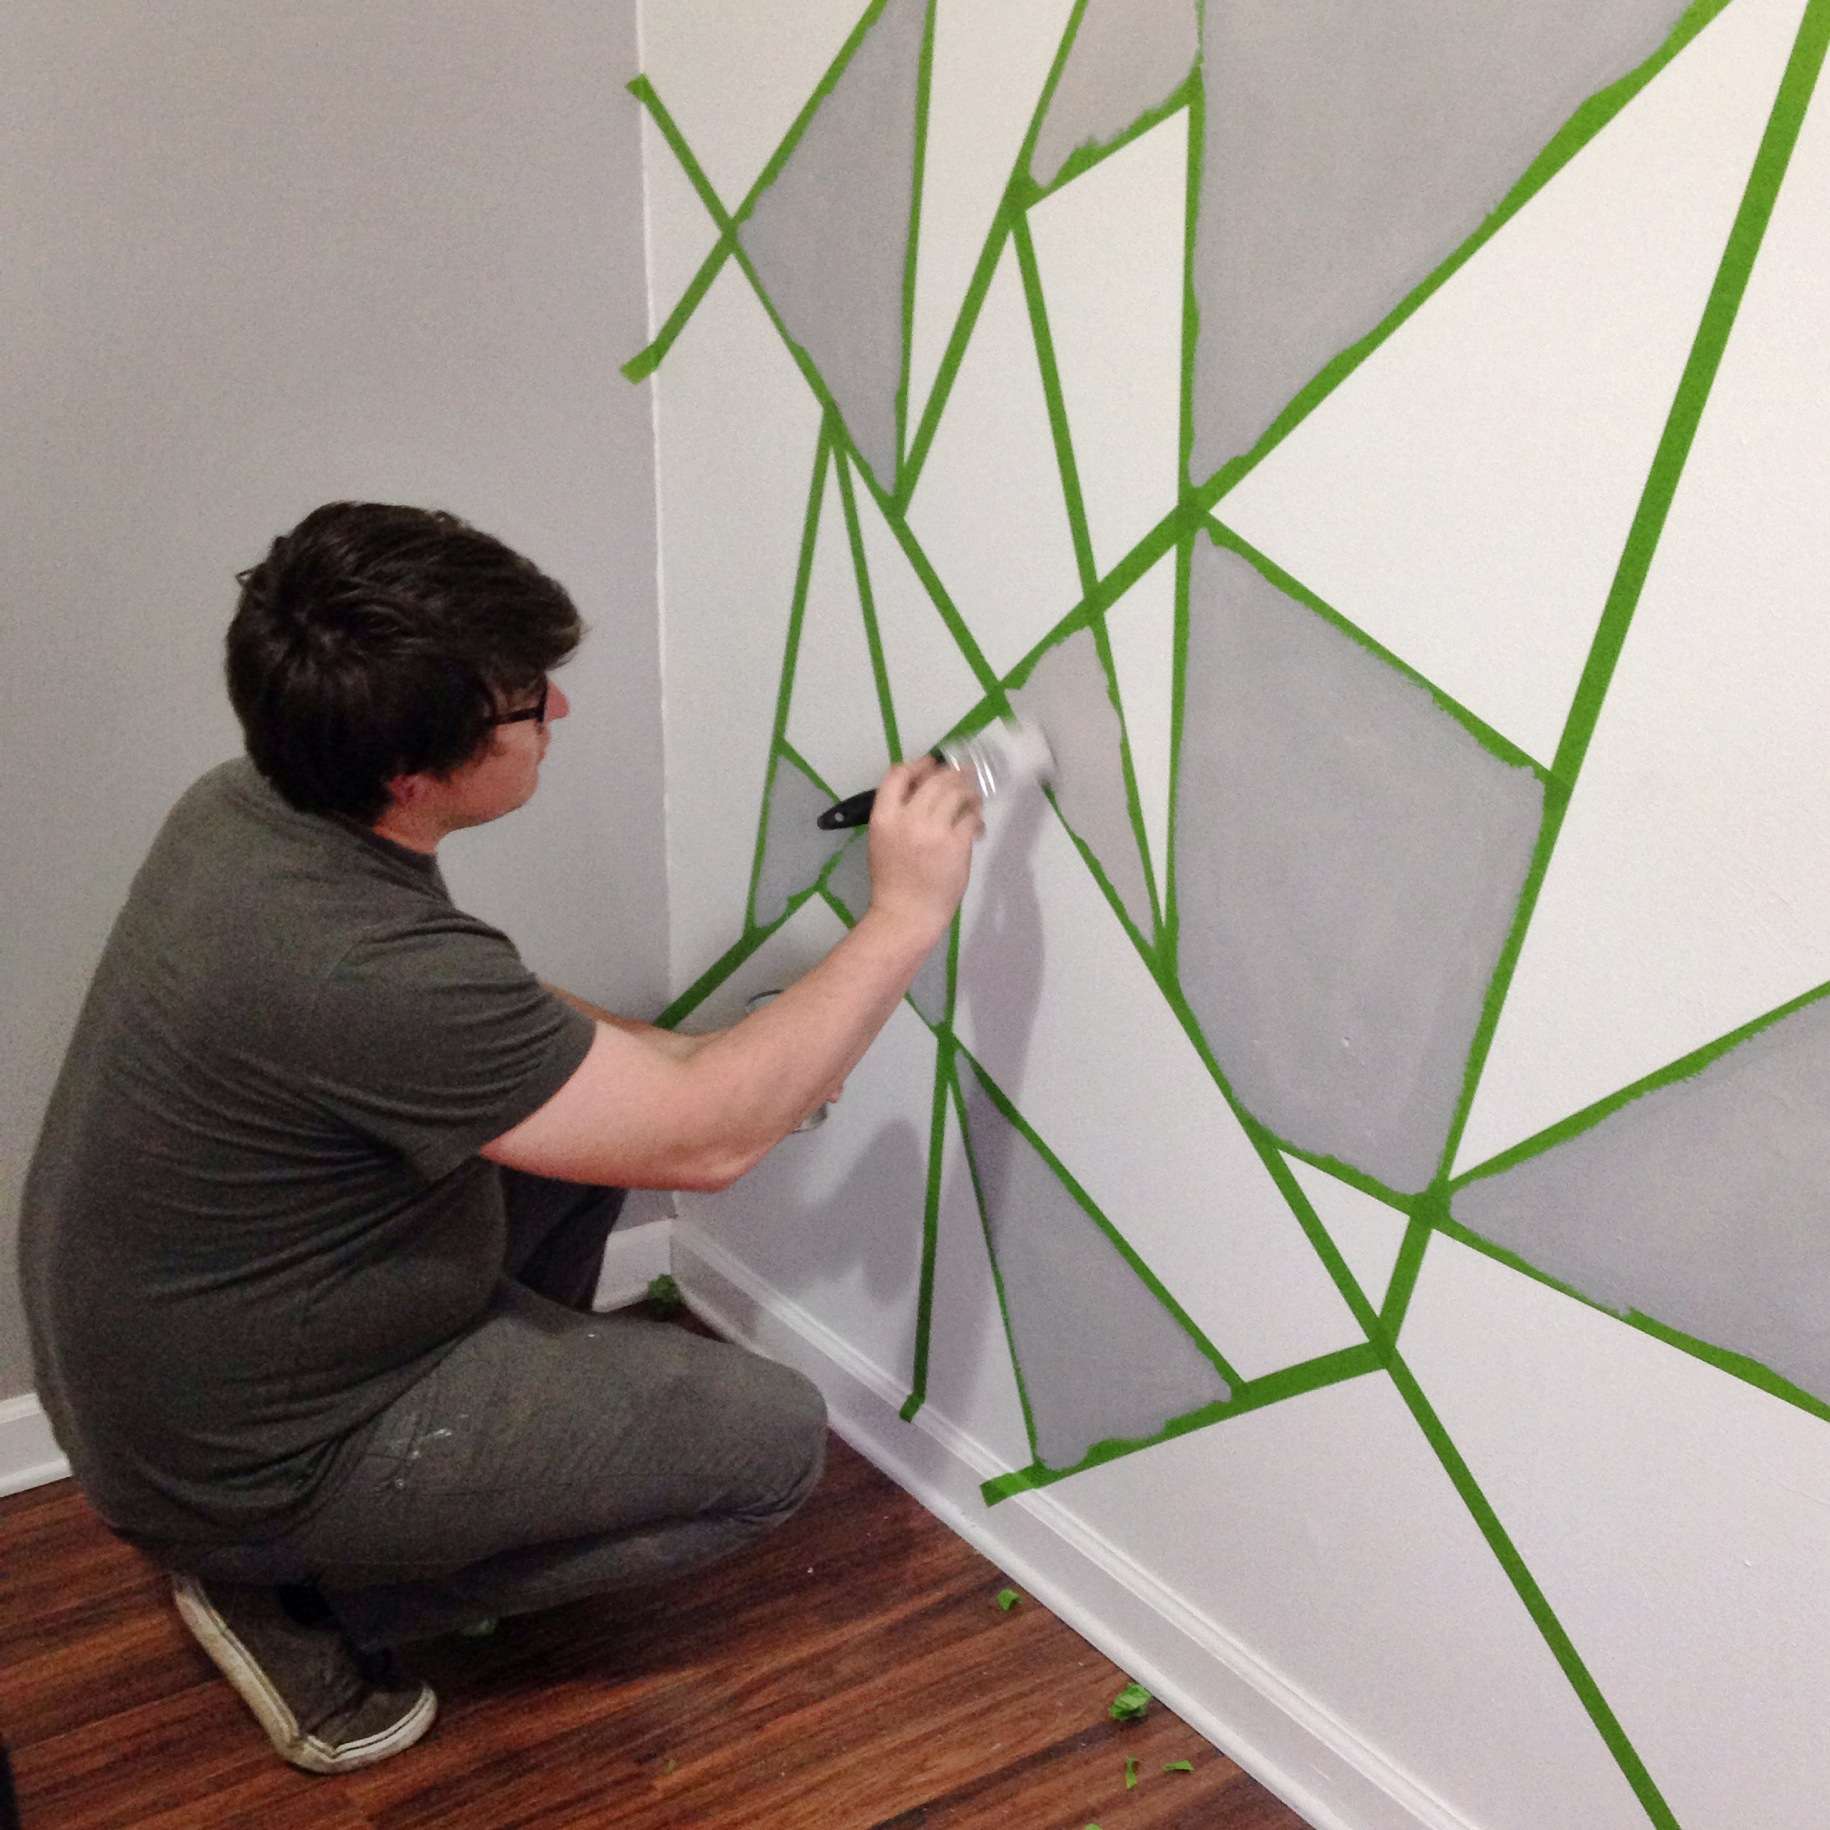
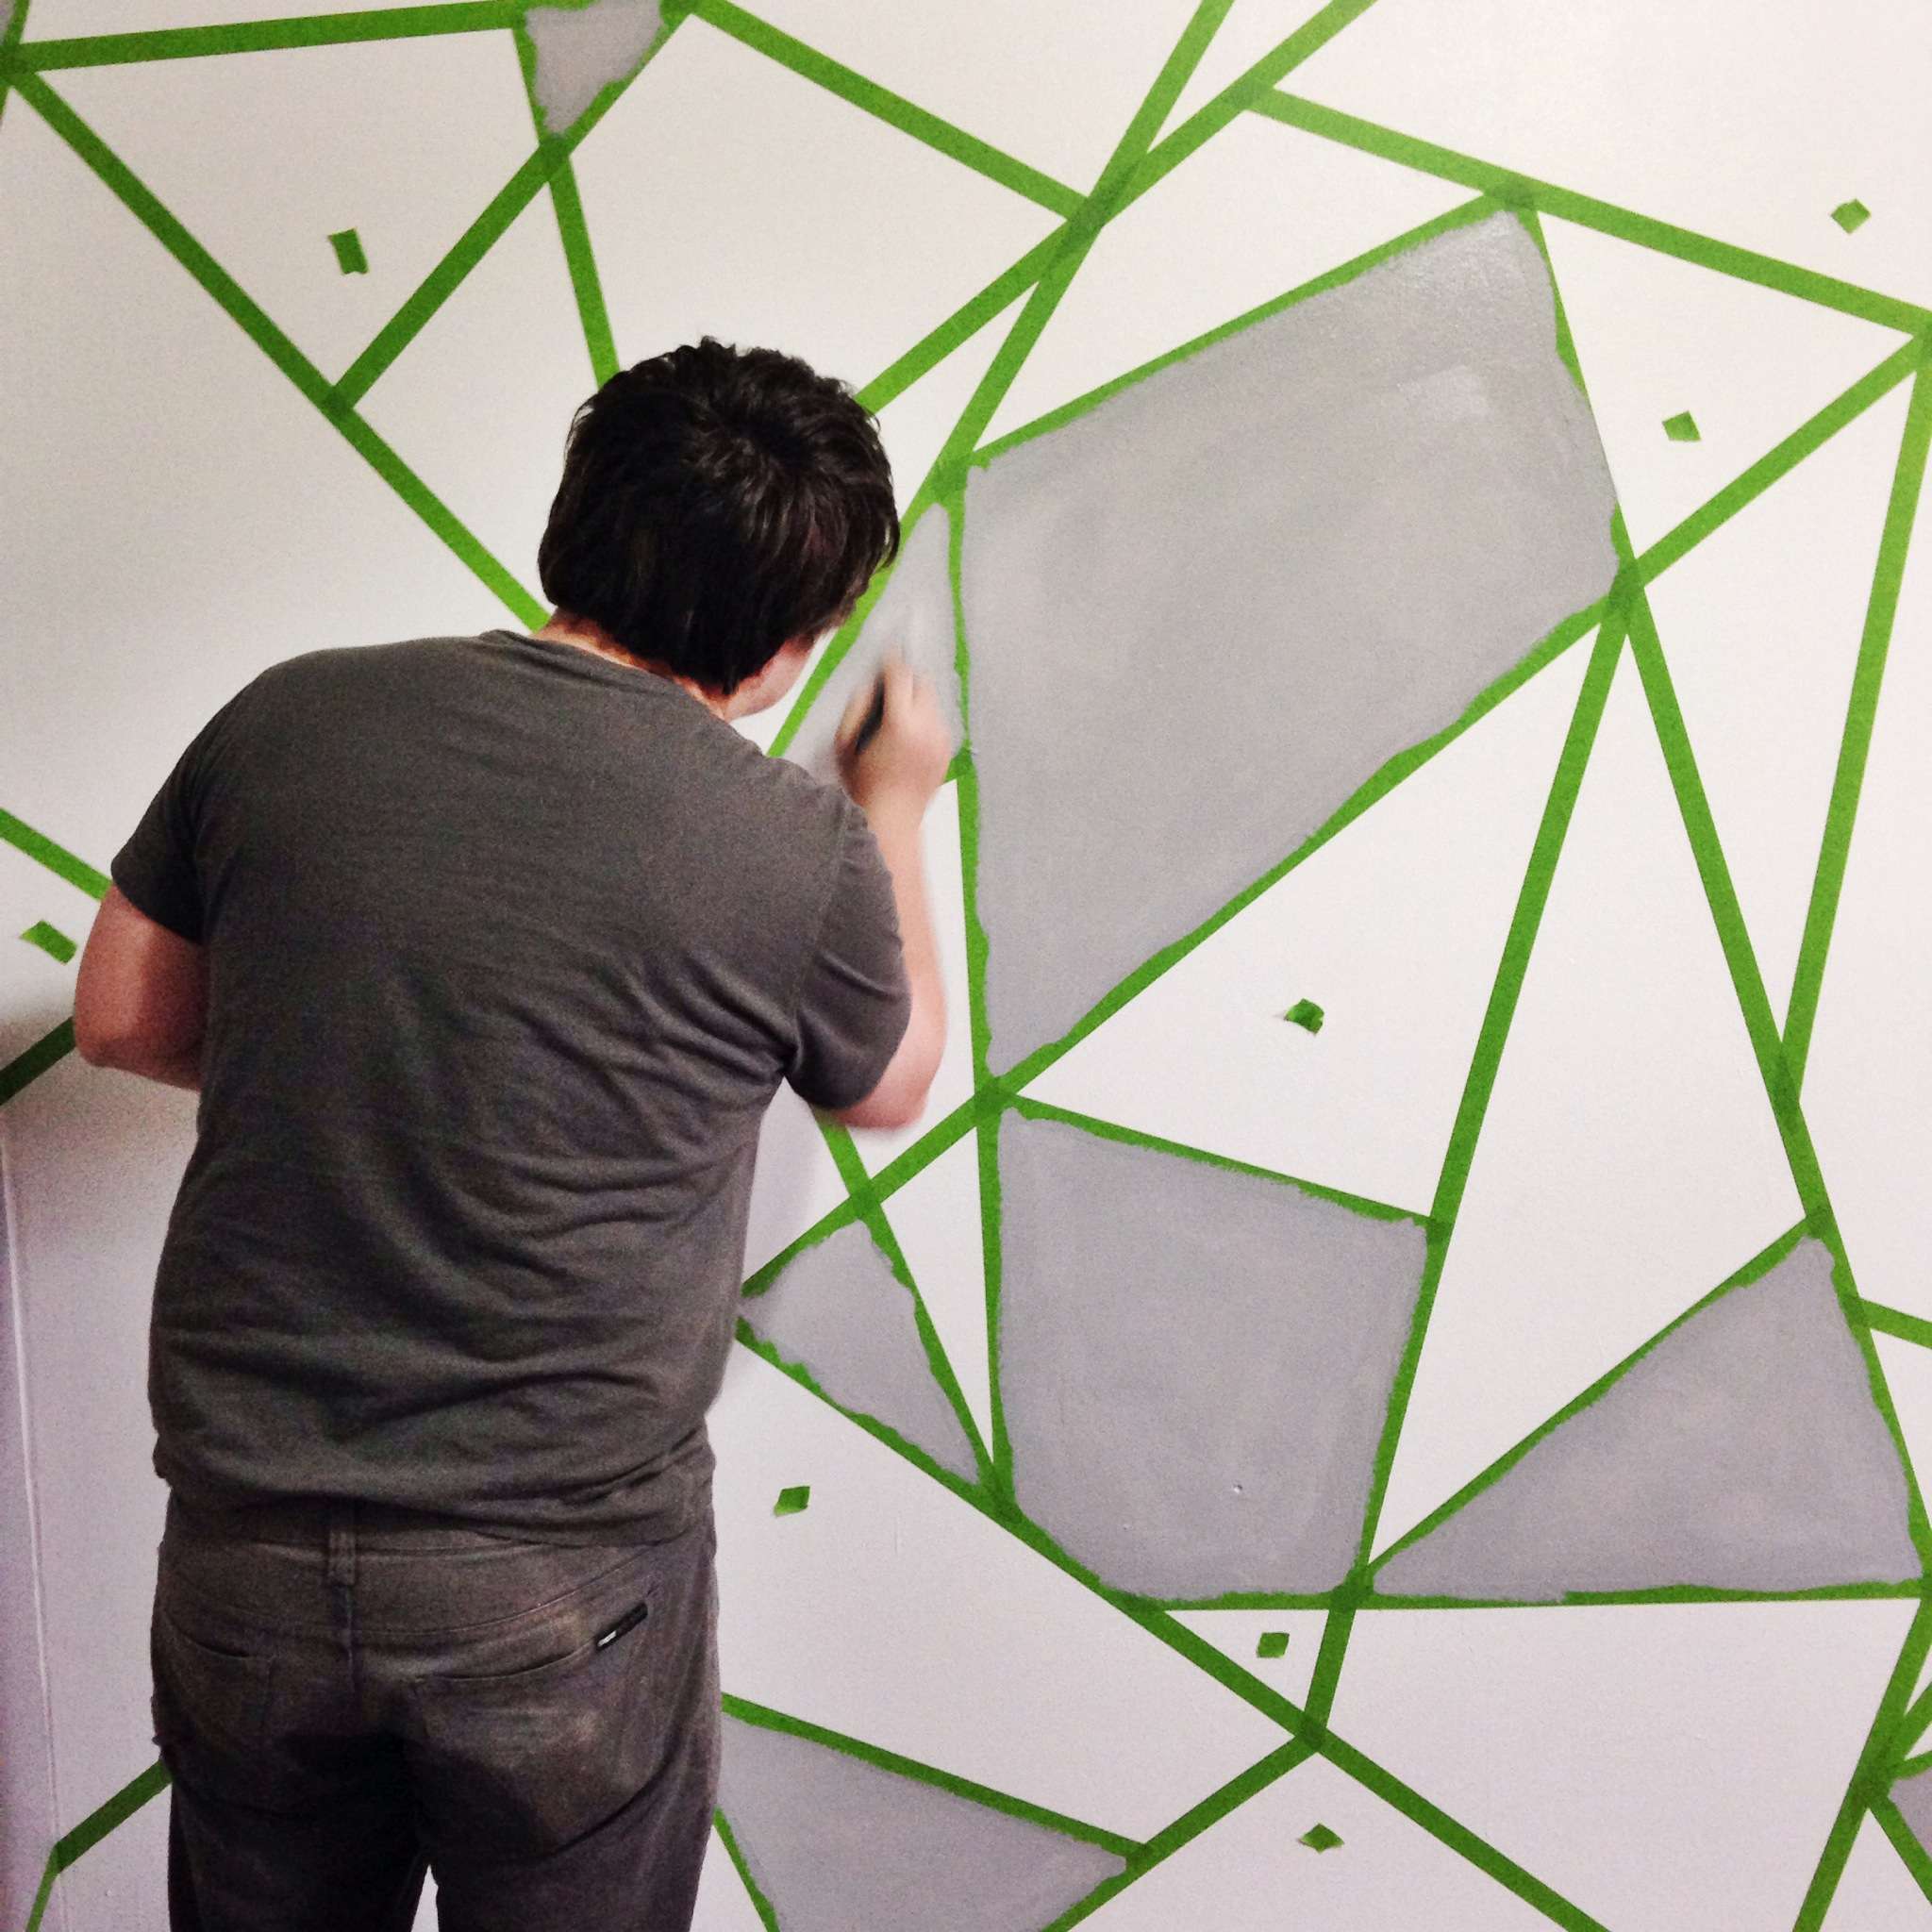
- After everything is taped, choose your middle color and then mark the shapes you want to be in that hue. We did this by taking small pieces of FrogTape and marking them. Mike was able to start painting the first color while I worked on figuring out what color was next.
- When picking colors, get three colors from the same paint swatch for the best results. Of course that's if you want a cohesive ombre color palette. Loads of people have used our original tutorial with contrasting colors and it turned out great. We just greatly prefer the coordinating hues. (Our middle grey is the exact color of our other 3 walls in the nursery. This made it feel really cohesive overall)
- Allow the paint to dry for roughly an hour or two, then remove the tape. Try not to leave it on longer than you have to. It's way easier to pull off when the paint is just sticky enough to release, but not so tacky it pulls with the tape. Last time I said ~15 minutes or so, but I think we had a better experience this time around.
- Try not to work from left to right or top to bottom with the paint. Step back and view your wall from across the room and pick shapes here and there to mark. This will ensure you have a better balance of colors at the end of the project.
- If you're only doing one wall, buy the Valspar paint samples! They're $4 each and 3 of them did our entire wall. That's only $12 spent! (We only have 8' ceilings, but you could make it work with 10' ceilings as well) This does not have to be an expensive undertaking!
- If you want to know the Valspar colors we used, they were: Cinder Block, Rocky Slope, and Cathedral Gray (from lightest to darkest).
Now that we have this tiny little bit of the nursery done, I'm excited to try and dive in deeper. It's hard to do much when you don't have the first piece of furniture, but I'm holding out hope we can spring for the items on our dream list. We printed the first pieces of "art" for his room this past weekend and now I just need it to all fall together. It'd be nice if it were that simple, right?
I'm working on a nursery moodboard right now and it's focused around the theme of his room. I'll be sure to share it soon, along with our ultimate nursery wishlist! That way y'all can chime in let me know if you have any experience with any of the brands or products! I'm going into this totally blind haha
Thanks for reading! xo


It turned out great! I'll miss that lovely glitter, but I love it :)
ReplyDeleteSo Cool! I might have to borrow this idea for my stairwell!
ReplyDeleteOh that looks so cool! I like :)
ReplyDeleteI feel like a baby shark theme would be appropriate ;)
ReplyDeleteThis is so awesome! I somehow missed it when it was pink but this looks awesome in gray too. :)
ReplyDeleteIt turned out so nice! Such a simple but unique way to add something new to a room!
ReplyDeleteLauren // Lipstick & Lacquer
OHHHH this is so cute. I want to do it!
ReplyDeletexx MaDonna
MeMaDonna.com
I'm expecting a little boy in August and I was wanting a bold decorative wallpaper to go on the wall behind his cot but this would be so much easier AND cheaper to do, it's such a good idea!! xx
ReplyDeleteBoth versions are gorgeous! I can already imagine the nursery is going to be the sweetest little space. Looking forward to seeing more. :)
ReplyDeleteI love a grey wall! Great way to change it up for a nursery :]]]
ReplyDeleteI am so sad to see your pretty glitter wall go but the grey is great too. I would love to try this on my wall too. It looks sooo cool!
ReplyDeleteIt turned out so great!! I was sad whenever I heard that your awesome glitter wall was going down, but to see that you did something equally as awesome with the space is awesome!
ReplyDeleteI love love love the gray!
ReplyDeleteOh, I love it! I actually think I like it better than the pink one, but I also am a huge fan of grey!
ReplyDeletexo,
Kay
www.whitetrashfairytale.com
I love the grey! I seriously need to do this whenever we move into our first home. I love the look of it!
ReplyDeletelove it!!!!!
ReplyDeleteI loved the pink glitter wall and I love the grey too! Seriously the best idea ever, and I really want to try it in our girls' playroom!
ReplyDeleteIt looks really good!
ReplyDeleteBut I'll always love the pink!
Not gonna lie, the pink glitter wall was AMAZING... but since I've got little men in the house, I understand the switch ;)
ReplyDeleteIt looks great!
This looks great! I love the grey. Ya know, I bet some silver glitter would look pretty cute somewhere on that wall :)
ReplyDeleteXOXO
Becca | Ladyface Blog
I so totally love this idea, I am definitely going to try it as a feature wall in our stair well!
ReplyDeletewww.kindoflovely.com
Love the way this turned out! I have to do this one day!!
ReplyDeletewww.lovedesiree.com
I love it!
ReplyDeleteI. Love. This.
ReplyDeleteI'm kind of sad to see the pink (and GLITTER) go away, but I do love the grey too! Absolutely perfect for a little nursery :)
I think I like the grey even better. I loved the gold glitter but I'm not a fan of pink so this is definitely my kind of wall :)
ReplyDeleteReally love this. I'd love to paint some of our room but we have vaulted ceilings & have to paint everything back when we move which I'm hoping will be next year. But then it should be a move to a house we're buying & then you can bet I'm going to PAINT ALL THE ROOMS. Lol. Especially with glitter. Mwahahahaha!
ReplyDeleteBoth projects look amazing! I loved the idea of glitter for a girl nursery.
ReplyDelete