

Hello everyone! I just got my Christmas tree a couple of days ago, and I don’t know about you guys but I love handmade Christmas ornaments! They don’t have to be too complicated either, here’s a tutorial for an easy and fun penguin ornament made of felt and some fabric scraps.
Here’s what you’ll need:
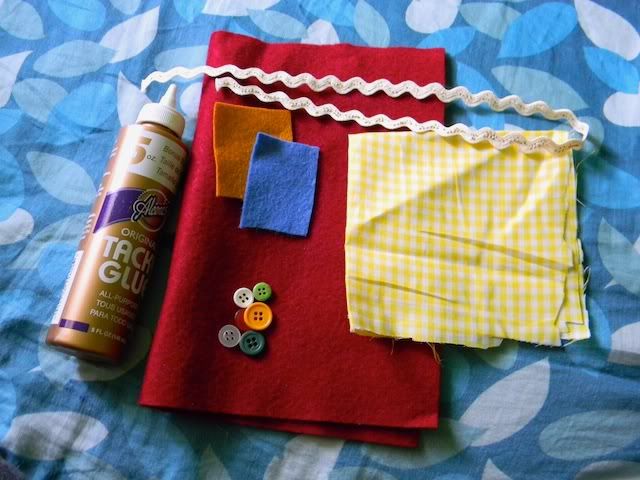
Some felt in a few different colors (one main color for the body plus a few scraps for the beak and bow tie), some fabric scraps, buttons, some ribbon or rick-rack, a needle and thread, some glue, and optional polyester fiber-fill (or other stuffing material).
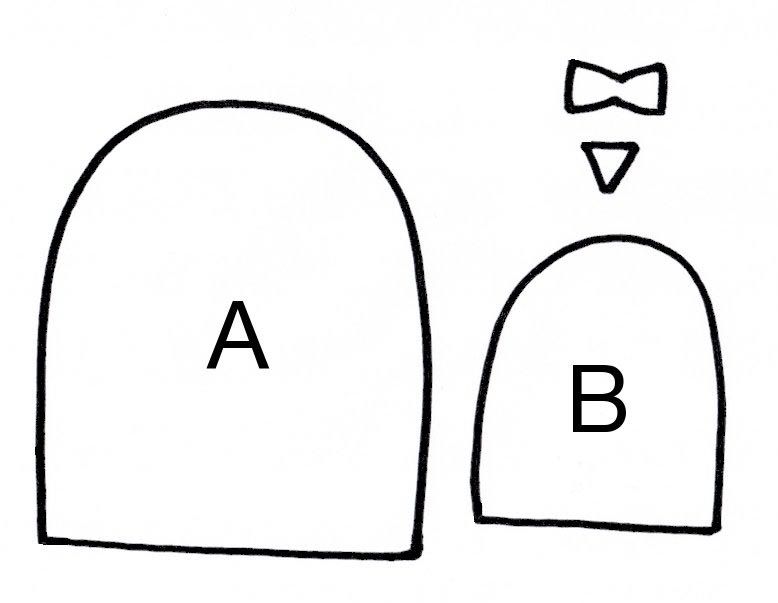
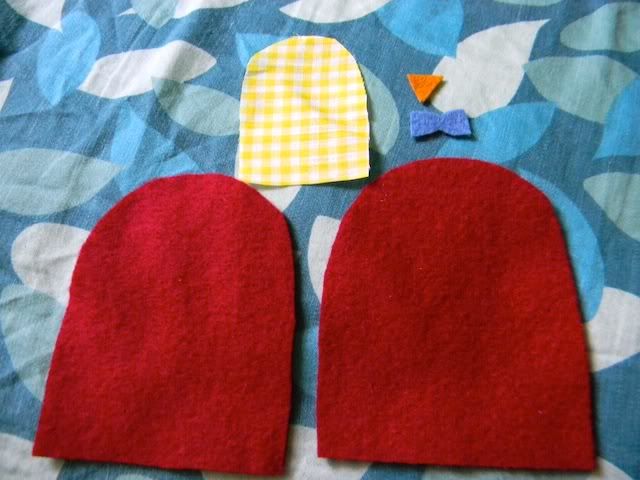
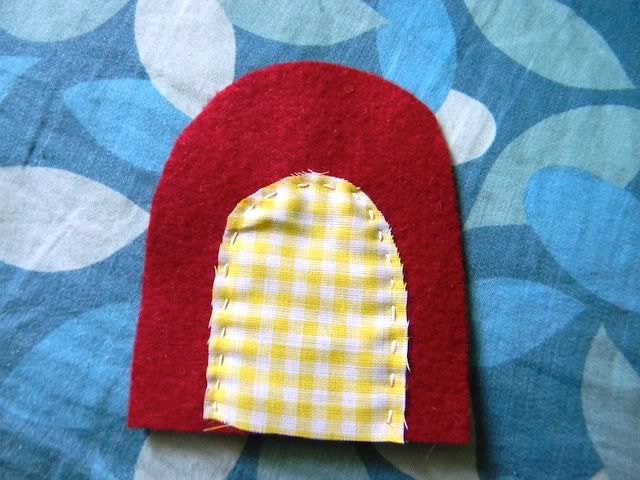
First, print and cut out the pattern pieces attached, then trace and cut out all your pieces. Part A will be cut from your main color of felt twice, this will be the front and back of the penguin. Part B will be cut from your fabric scraps, this will be the belly. And the bow tie and beak can be cut from other scraps of felt.
Next, you’re going to want to sew or glue the belly piece onto one of your pieces of felt. Line the bottoms of the pieces up. If you’re choosing to sew it on, you only need to sew the arch part, as the bottom will get sewed together later when you sew the back and front together.
Next come the eyes, you can again either sew or glue on the buttons. Then glue on the beak and bow tie. I prefer to glue these rather than sew because they’re so tiny. If you’re using tacky glue, don’t worry about getting any on the felt, it will dry clear!
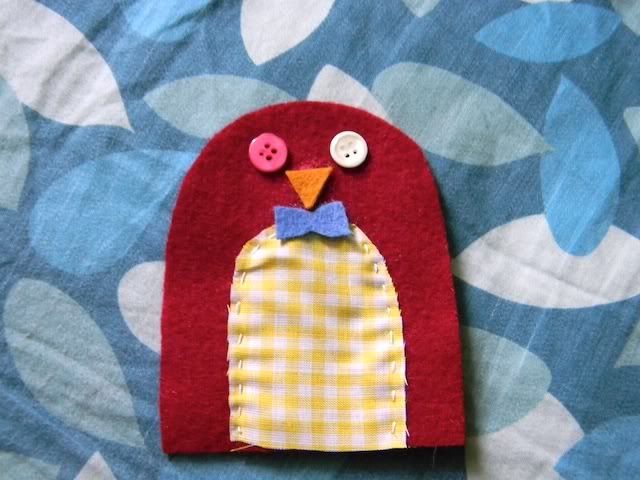
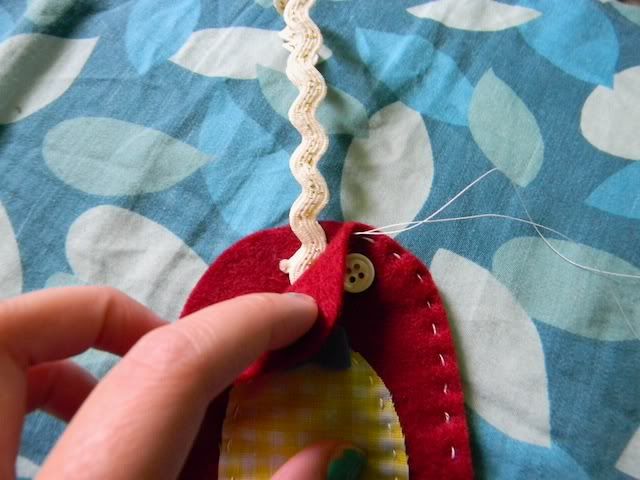
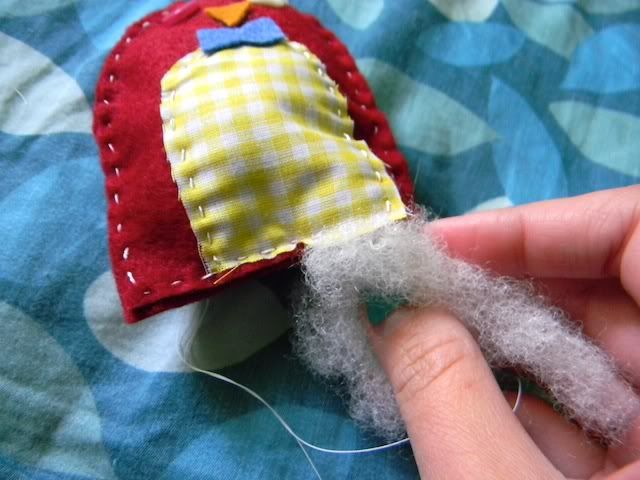
Now you have the front of the penguin done! If you wanted to make this a no-sew project, you could easily glue on some ribbon to the top of the penguin and he’d be all ready to hang. But if you’d like to stuff the penguin, it’s time to stitch him all together! We’re going to stitch this front piece to the other piece of felt you’ve cut out. Lay the front piece on top of the back, and start to sew a running stitch all around the edges.

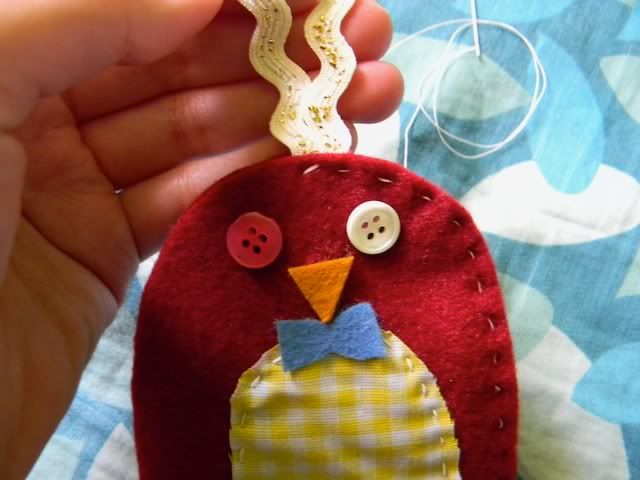
Once you get to the top, fold a piece of ribbon or rick-rack and lay it in between the front and back of the penguin. Sew over this to secure it.
Continue sewing all the way around, until you have about 2 inches left to sew. Stuff the penguin as little or as much as you’d like. I personally like mine a little plump =]
Finish off the stitching with a knot and you’re all done!
I love to make these little penguins in all kinds of color + fabric combinations. They make great gifts and look perfect on any tree!
Happy crafting!
-Lindsay
-------------------------------------------------------------
Be sure to stop by Lindsay's etsy shop to see her cute little pieces of felty-goodness! (The shark is my favorite! Followed close behind by the Sweet Autumn headband!) Thanks Lindsay! Stay tuned for a magical metallic foil wreath by SusannahBean coming up later today!


What a cute little penguin!
ReplyDeleteSOOOOOOOooooooooo cute!!!!!!
ReplyDeleteI am most surely going to making a few of these today!!!!!!!
Thank you so much for this post!!!
Happy Holidays!!
xoxo
This is so cute! I just might have to try it this year! :)
ReplyDeletethis is so adorable! i want to make one.
ReplyDelete<3
ReplyDeleteI'm definitely going to have to make this!
yhs.
Aw, this is the cutest thing!
ReplyDeleteSuper cute! Love penguins!
ReplyDeletesooo stinkin cute!! love it.
ReplyDelete-kellie