
Mike and I had a lot of fun decorating our Dream Tree this year, and because it was such a unique and exciting opportunity we decided to go all out and just have fun with it. Since we didn't really want to just pick up off-the-rack ornaments, we had to get a little bit crafty. For part two of November's Michaels Makers challenge, I'm going to share a few of our tree decorating tips!
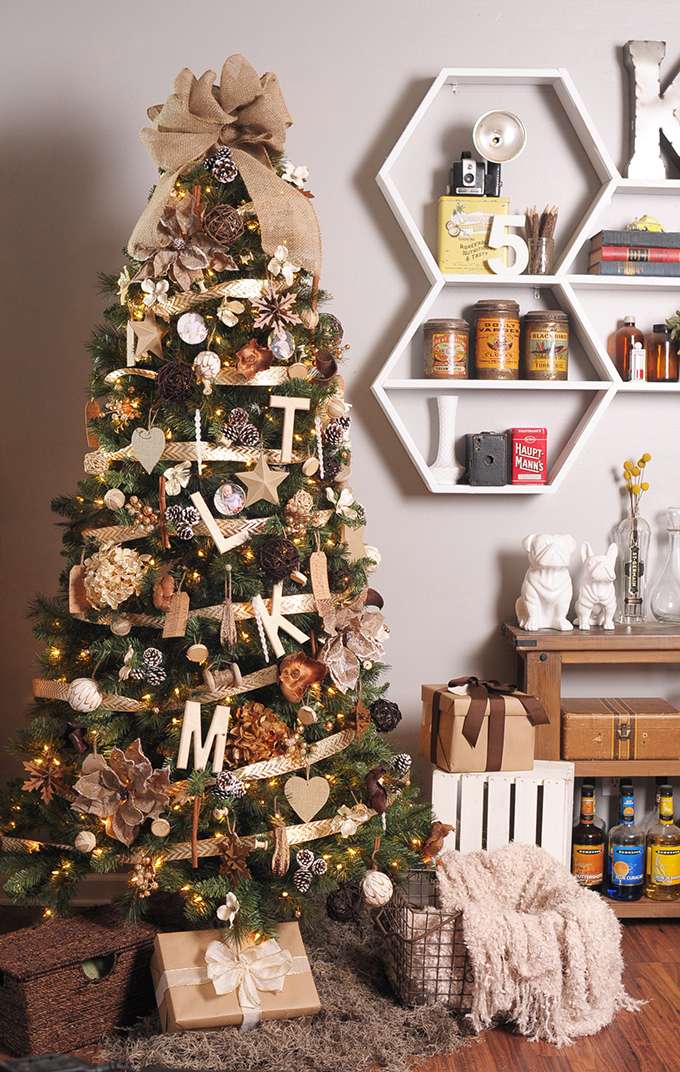
+ Choose a color palette and/or theme for your tree. Let the color palette set the tone for the look and feel of your tree. We wanted to do something super rustic and cabin-inspired, but still "pretty" and "stylish". This helped us narrow down our color palette to creams, browns, and shades of ivory, and then we added in gold glitter.
+ Always start with the ribbon! If your tree isn't pre-lit, obviously do the lights first. But lay the ribbon as a base so you're able to build on top of it and fill in the negative spaces. Try to match the thickness of your ribbon to the size of the other major ornaments on your tree. That way you don't have wide ribbon with tiny ornaments or vice versa.
+ Mix and match textures. One of my favorite things about our tree is the wide variety of textures that hang on it. Everything from burlap to cork, wood, kraft paper and silk. The varied textures add depth and warmth to the tree.
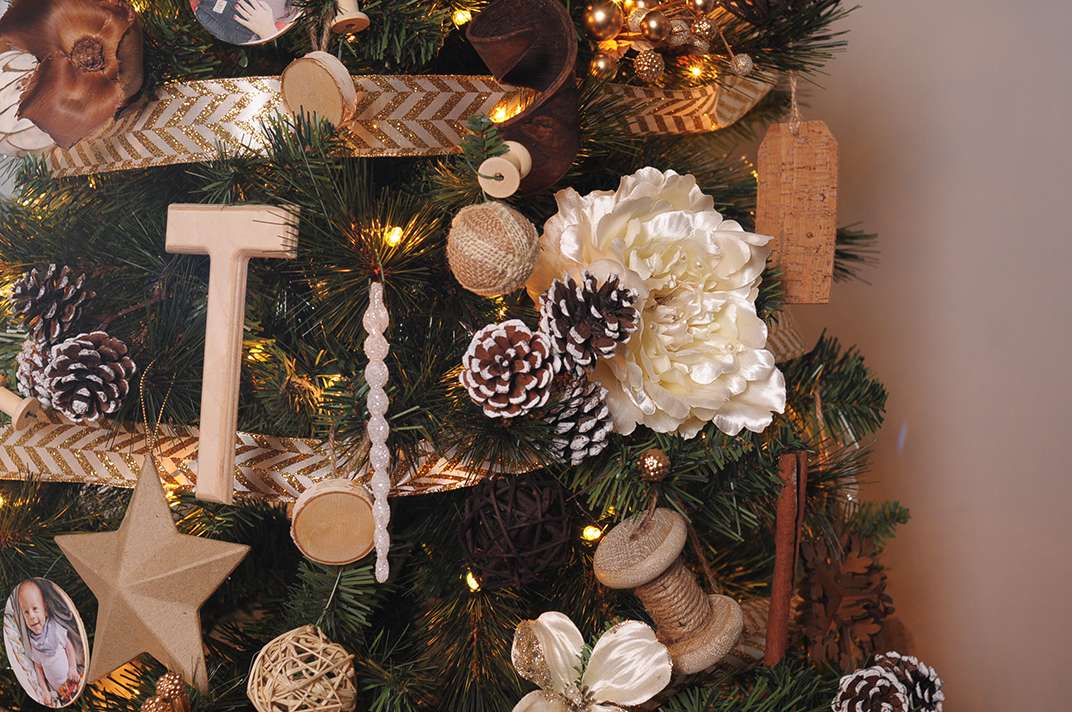
+ Don't be afraid to decorate with everyday objects. A good 90% of our ornaments weren't actually ornaments to start. We simply searched for objects that fit the color palette and theme of our tree, and then we fashioned them into oranments ourselves. We chose things like cork gift tags, tiny wooden spools, cinnamon sticks, silk flowers, and decorative potpourri pieces to adorn our tree. A little bit of hot glue and twine go a long way! You can also use the little green ornament hooks so they'll blend in with the tree and the ornaments will look like they're floating.
+ Use filler pieces to help round out the design. Since we wanted to make our tree as rustic as possible, we used small "boutonniere" style bouquets of pinecones (3 per group) and we twirled them around the ends of some tree branches. This helped give a more realistic look to our tree. Then we took similar bouquets of golden foliage and added them in as an accent.
+ Have an eye catching tree topper. I love how large and attention grabbing our burlap bow is. It not only fits in perfectly with the theme, color palette and texture of our tree, but it acts as the perfect "cherry on top" for us.
+ Make it personal. The most important part of a Christmas tree for us is making it personal and allowing it to represent our family. Every year each member of our family picks out a new ornament for themselves, and then we get a "family" ornament, too. Normally the family ornament has the year on it, and often includes a photo of us. It's such a fun way to look back on how much we've grown over the years. For our Dream Tree we opted to hang wooden initials for each of us, and then I made some Instagram ornaments with some small balsa wood pieces and mod podge.

+ Keep the theme going below the tree, too. Don't stop at just the ornaments and tree topper. Keep the theme alive in the tree skirt and the gift wrappings! Since Linden isn't crawling yet and Toby is old enough to follow directions, we opted to do something pretty different for our tree skirt. We used three bags of dried Spanish moss and created a nature inspired tree skirt. Then we wrapped our gifts with kraft paper (to match the kraft paper ornaments on the tree) and used brown and ivory/glitter ribbon to round out the look. Since there were so many textures on our tree, we opted to use wooden baskets, crates, and weathered metal baskets to hold extra gifts. And how perfect are those cork wine containers?!? (They were only $2 each at Michaels!)
++++++++++++++++++++++++++++++++++++++++
These are just our tips and ideas for our Dream Tree. The awesome thing about dream trees is that everyone has a different vision of what theirs will look like. Whether you're envisioning rustic or modern or ultra shabby chic, don't worry about what is traditionally accepted and just go for it!
And don't be afraid to throw out every single one of these "tips" and just do your own thing. Some of the very best trees are those that are truly personal. Every "First Christmas" ornament, every Elmers-glue-covered popsicle stick snowflake your kid brought home in elementary school, and every silly, novelty ornament you could ever get your hands on. Your tree doesn't need to look like it waltzed out of a department store to be special and beautiful.
++++++++++++++++++++++++++++++++++++++++
If you haven't seen the dream trees from the other Michaels Makers yet, be sure to drop by The Glue String. They're all so unique and beautiful! You can also check out the wide range of Make It Merry projects made available for you and your family to get crafty this holiday season! If you want to spread some holiday cheer, share a photo of your favorite dream tree on Facebook, Twitter, or Instagram (or share your own if you're part of the "decorate before Thanksgiving" crowd like me!) and be sure to tag it with #TagATree.
And just for fun: if you're near a Michaels store, they're hosting a Pinterest Party tomorrow, Saturday November 15th from 1 to 4pm. Pop in and create a fun holiday project with the help of a Michaels associate!
Do you have any handy tips or tricks for decorating your tree that you'd like to share?!
PS; I responded to all of the comments on our Dream Tree reveal post! Sorry that took so long!
Do you have any handy tips or tricks for decorating your tree that you'd like to share?!
PS; I responded to all of the comments on our Dream Tree reveal post! Sorry that took so long!


This looks amazing, I love it! I love what a big impact it makes and you didn't have to go out buying expensive ornaments. Great work.
ReplyDeleteThis year it's my boyfriend and my first Christmas while living together. We got our tree and went a little crazy getting decorations. I am so looking forward to it! I agree with your advice on theme. We went with a traditional gold/red theme and so far, I'm loving the items we have picked out!!
ReplyDeleteCan I get them up now? ;)
In a Nutshell...
Your tree is gorgeous! I can't wait to put mine up :D
ReplyDeleteLooks so AO beautiful! I absolutely love it! Cant wait to put up mine :)
Deletebeautiful decoration.
ReplyDeletehttp://beautyshinewoman.blogspot.pt/
You already have your tree up?! That's insane, but I must admit I'm loving the way it came out. I'm thinking this years theme is going to have to be black/white/gold but I'm definitely going to keep your 'everyday objects' tip in mind!
ReplyDeleteIf you pop over to the reveal post you'll see that it's part of my November challenge with Michaels Makers. Typically we put our tree up the week of Thanksgiving :)
DeleteAhh now I'm even more excited about putting my decorations up, although I'm holding out until 7th December (if I can). Might be hard this year, I'm already feeling so festive. xx
ReplyDeleteYour tree is lovely. I just posted a blog about my decorating style... which is ... um... quite a bit different from yours! Ha.
ReplyDeletehttp://lookmamaloves.wordpress.com/2014/11/26/decorate-a-great-christmas-tree-without-even-trying-or-caring-4/