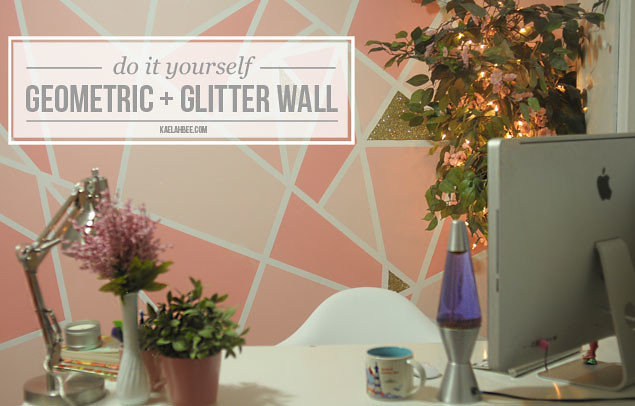
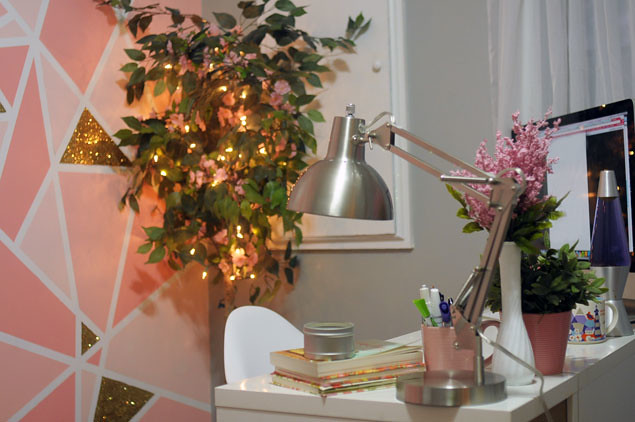
Okay! I'm so stoked on how excited y'all were about our geometric glitter wall! Seriously I've been dying to share this project since we did it and it's so easy! I think everyone should have a glitter wall in their house but I'm obviously super biased so whatever. Let's talk about a few things first, yeah?
Before you dive head first into adhering glitter to your walls, ask yourself these questions:
- Are you the type of person who will go bonkers if you have glitter stuck to you after 3 days/showers?
- Does the thought of finding more glitter in your bra than on the wall freak you out?
- Does the room you want the glitter wall in have carpet?
If you answered yes to any of those questions, you might be best just sticking to the geometric flat paint or opting for a glitter paint (
Martha Stewart has one!). You can get around #3 by laying down a slick dropcloth (don't do a canvas/fabric one!) but seriously, don't blame me if you're stuck with glitter in your carpet forever! That's my disclaimer! Real glitter ends up looking so much better than a glitter paint in my opinion.
But really, you will find glitter everywhere. In your bra. In your hair. On your eyelids. And quite possibly your underwear. I don't know how it got there either. Maybe wear a turtleneck if it gives you the heebie jeebies. Picking tiny pieces of glitter off of yourself for a week is so worth it! I promise.
Okay... now the part you've been waiting for! Let's get geometric!
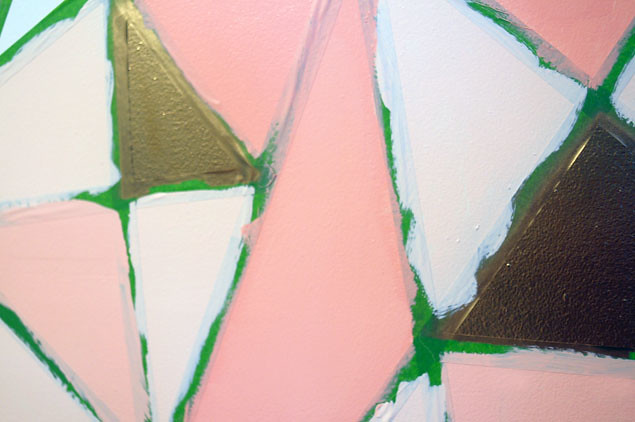
I was totally serious when I said this wall cost us around $15. Granted we had the glitter and ModPodge already, but it doesn't take much at all. We painted an 8x11' wall and had plenty of paint leftover afterward. We picked a Valspar paint swatch with 3 colors on it and just had the lady at Lowes mix up a sample size ($3!) of each color. We knew these shades would work well together since they came from the same swatch card. (Our colors are: Baby Blush, Peach Whisper, and Peach Punch)
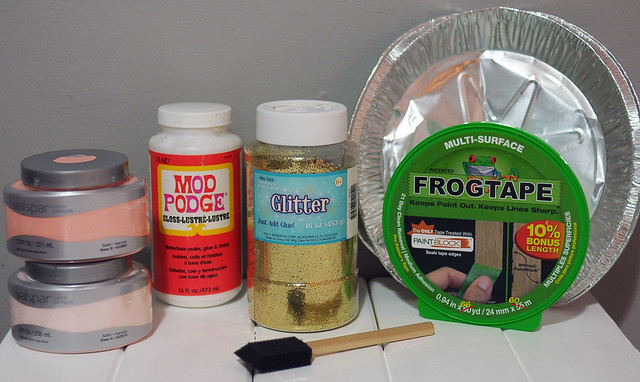
SUPPLIES:
Satin finish paint in the colors of your choosing (we used 3 colors + a metallic spray paint)
ModPodge (Gloss)
Glitter
Foam brush
Aluminum pie plate (or paper plate)
Frogtape (we used .94")
INSTRUCTIONS:
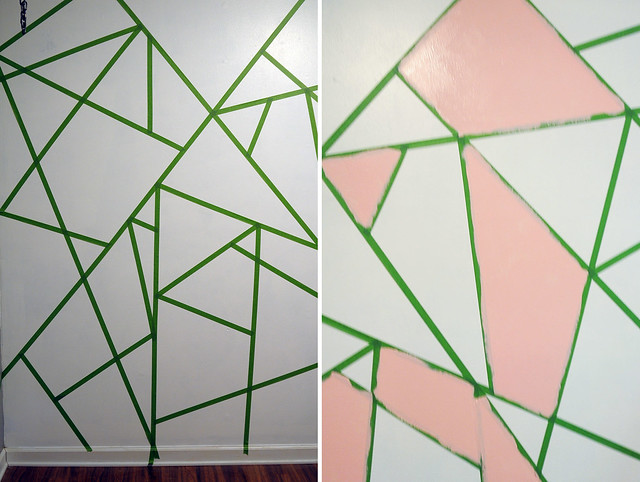
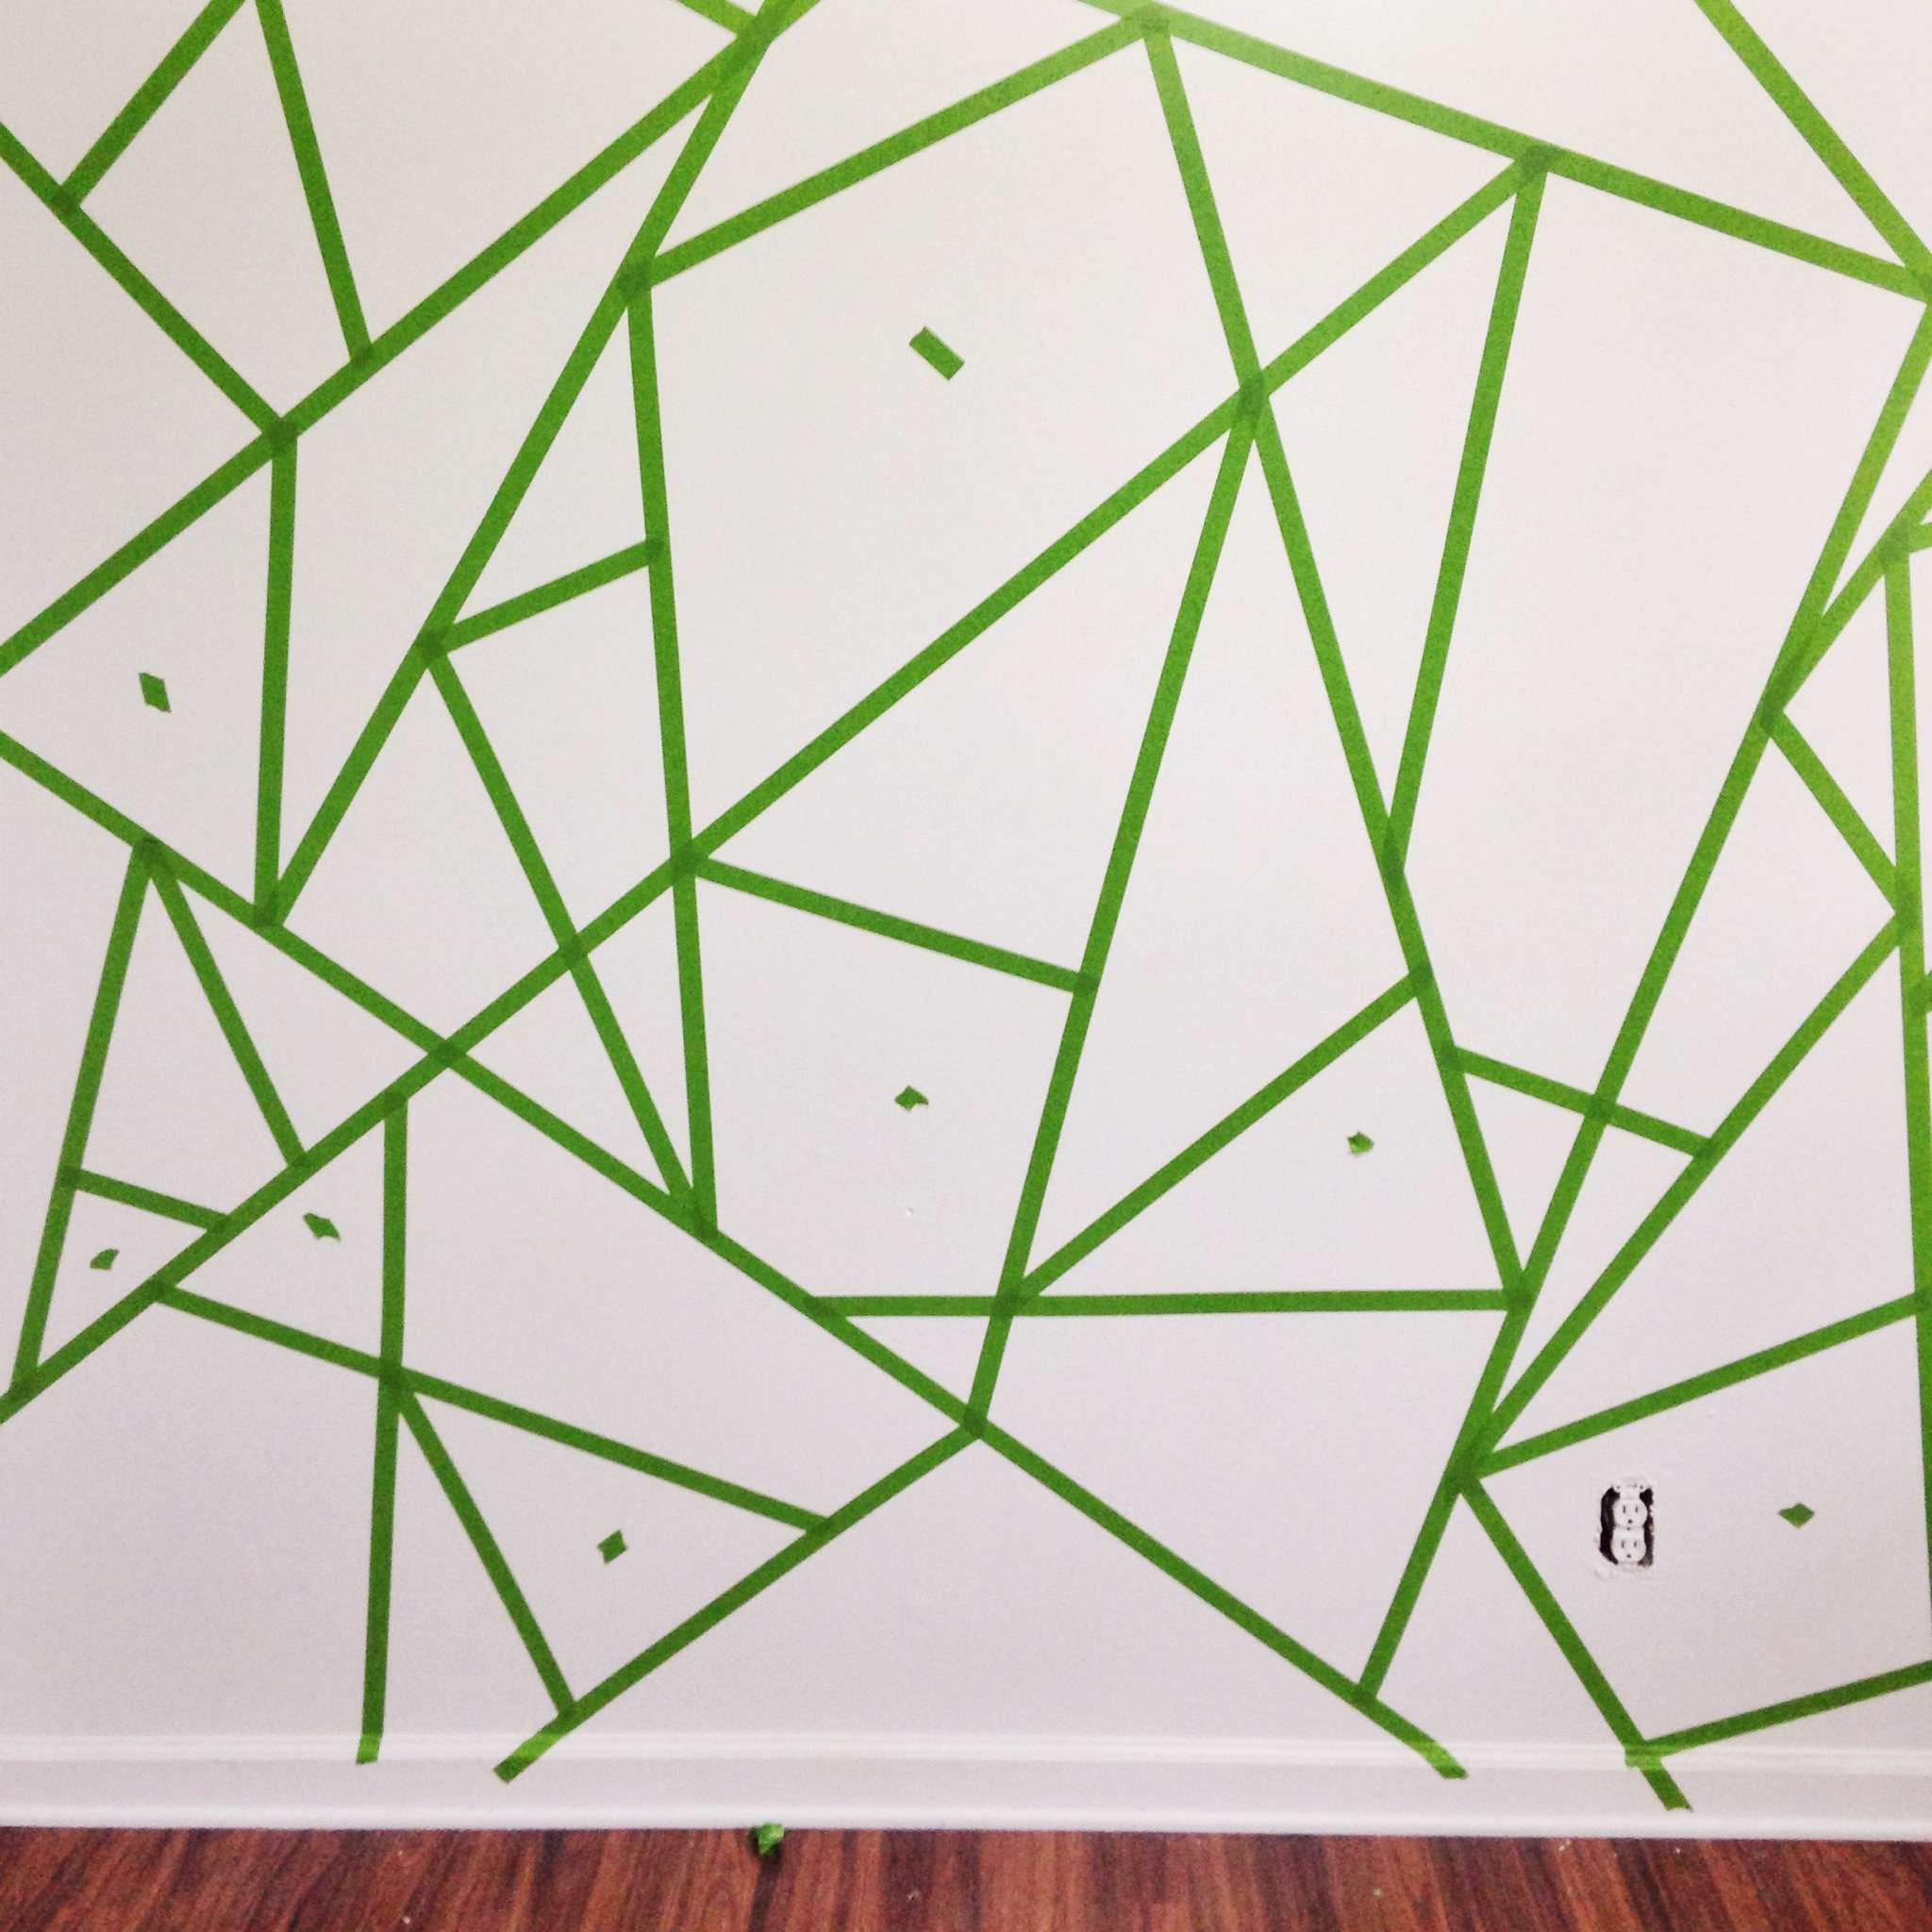
Get crazy with your
Frogtape! Whatever shapes and lines you want, slap that sticky stuff on! We had no rhyme or reason to our design, but we started with larger diagonal lines and then just built off of them. To be honest it's sort of a blind project where you have no idea how it'll turn out until it's done. We were skeptical, too, but now we are believers!
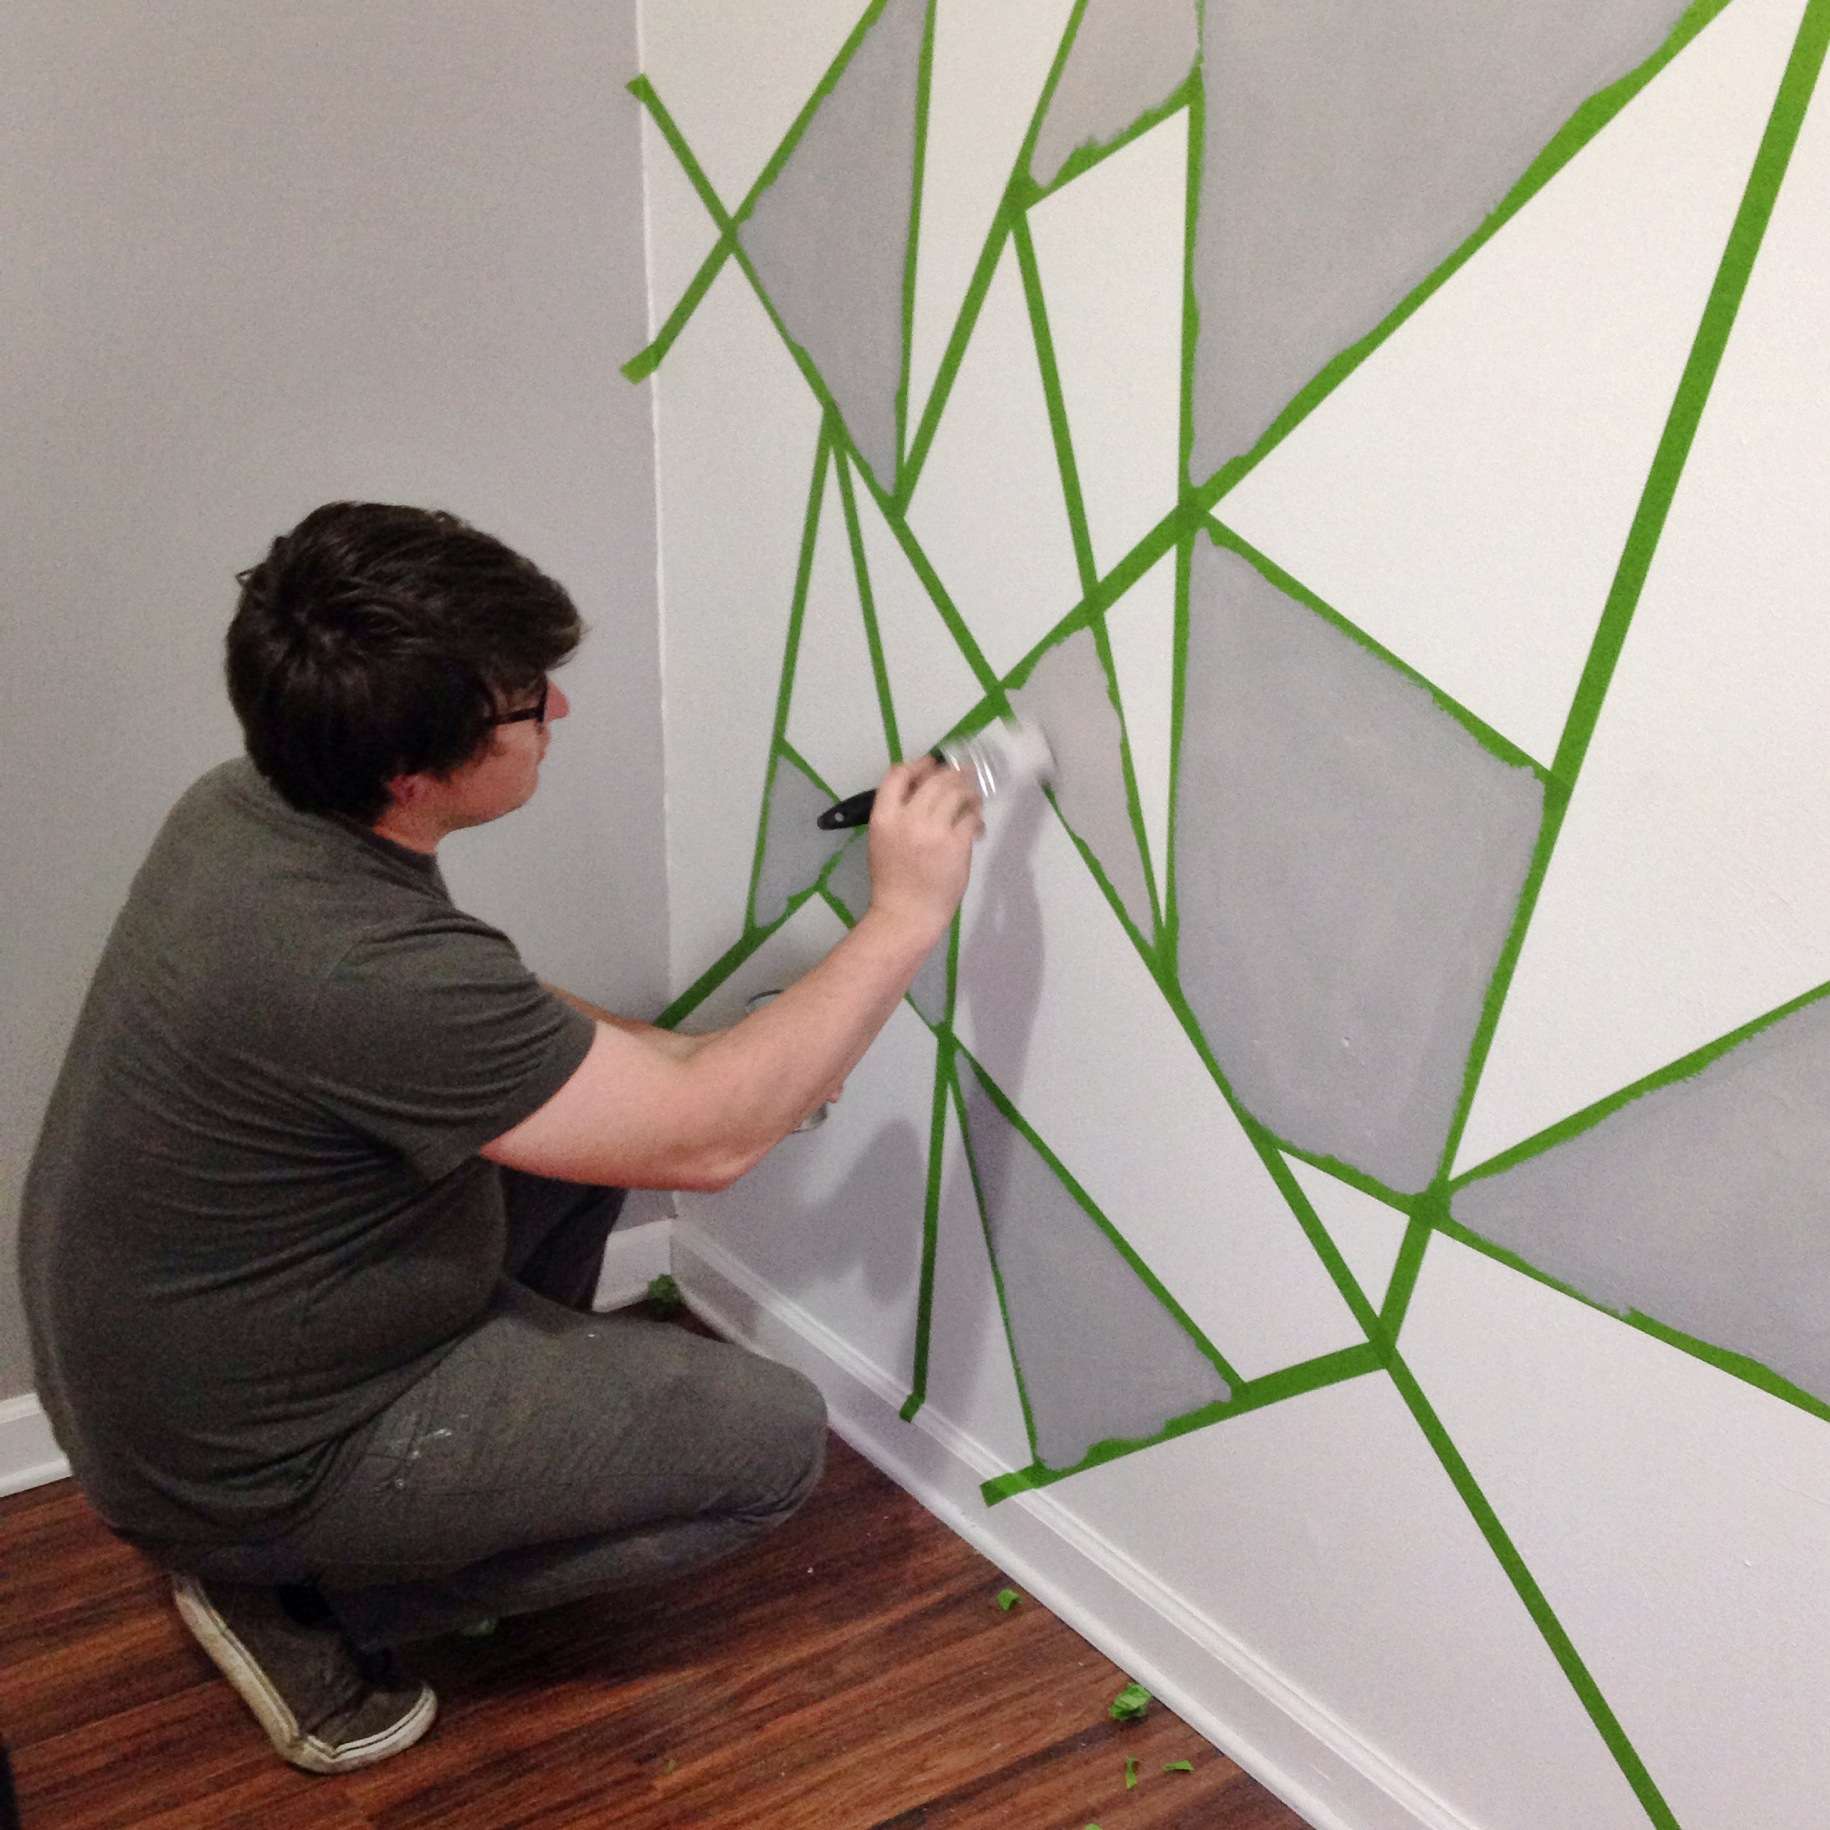
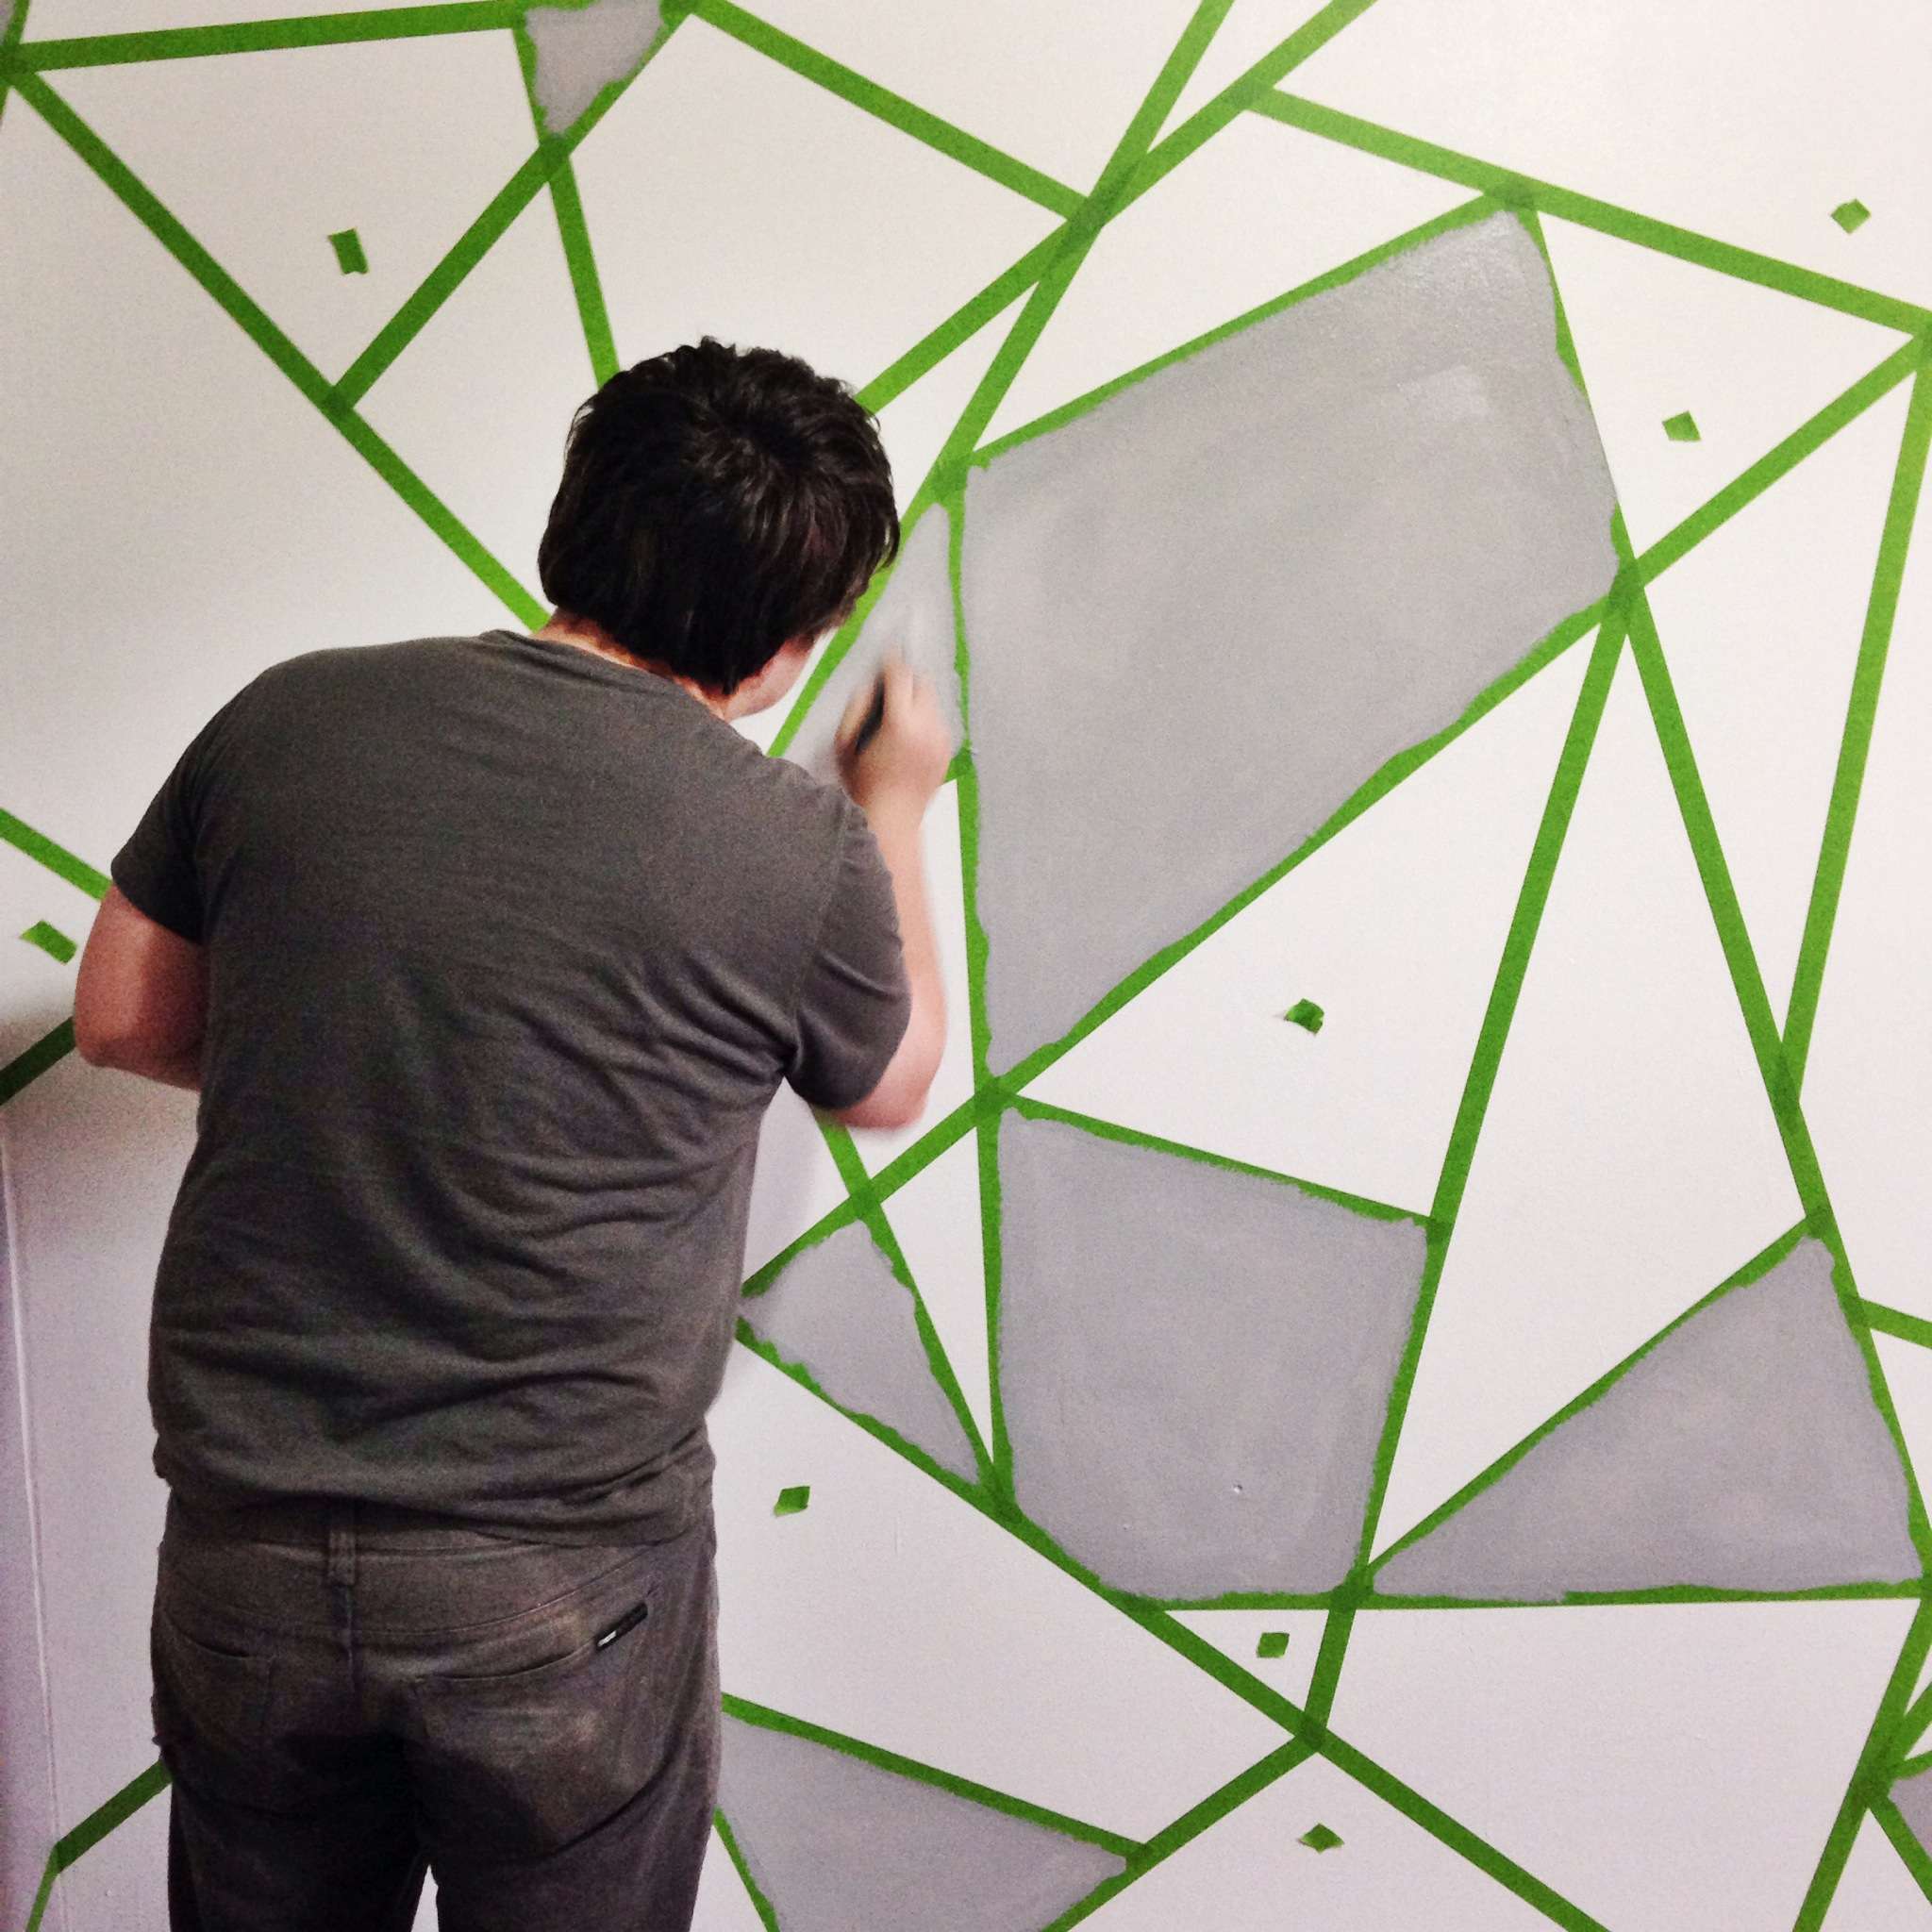
Once you've laid your
Frogtape down, decide what color will be your "median" color and paint those first. We painted our medium pink to start, then we painted the lighter and darker shade at the same time. We just eyeballed what we thought would look good and went for it. You can always fill "holes" with the median color, too. You'll start to see how it all works together once you get 2/3 of your wall painted.
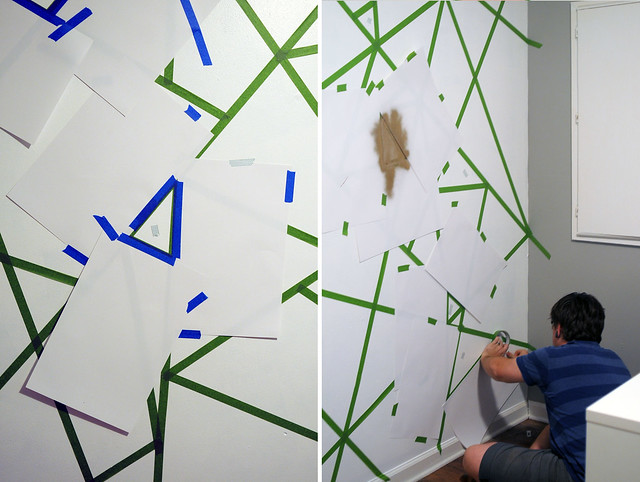
Our photos are a little out of order considering we opted to do gold spray paint on a few shapes first. The metallic paint fell a little flat for us so that's where the glitter came in. If you want to do the spray paint, just be sure to cover up the shapes around it with paper first. The smell of spray paint in your home should be enough to make you not want to do it, but hey, it's a lesson learned! All ideas can't be good ideas, right?
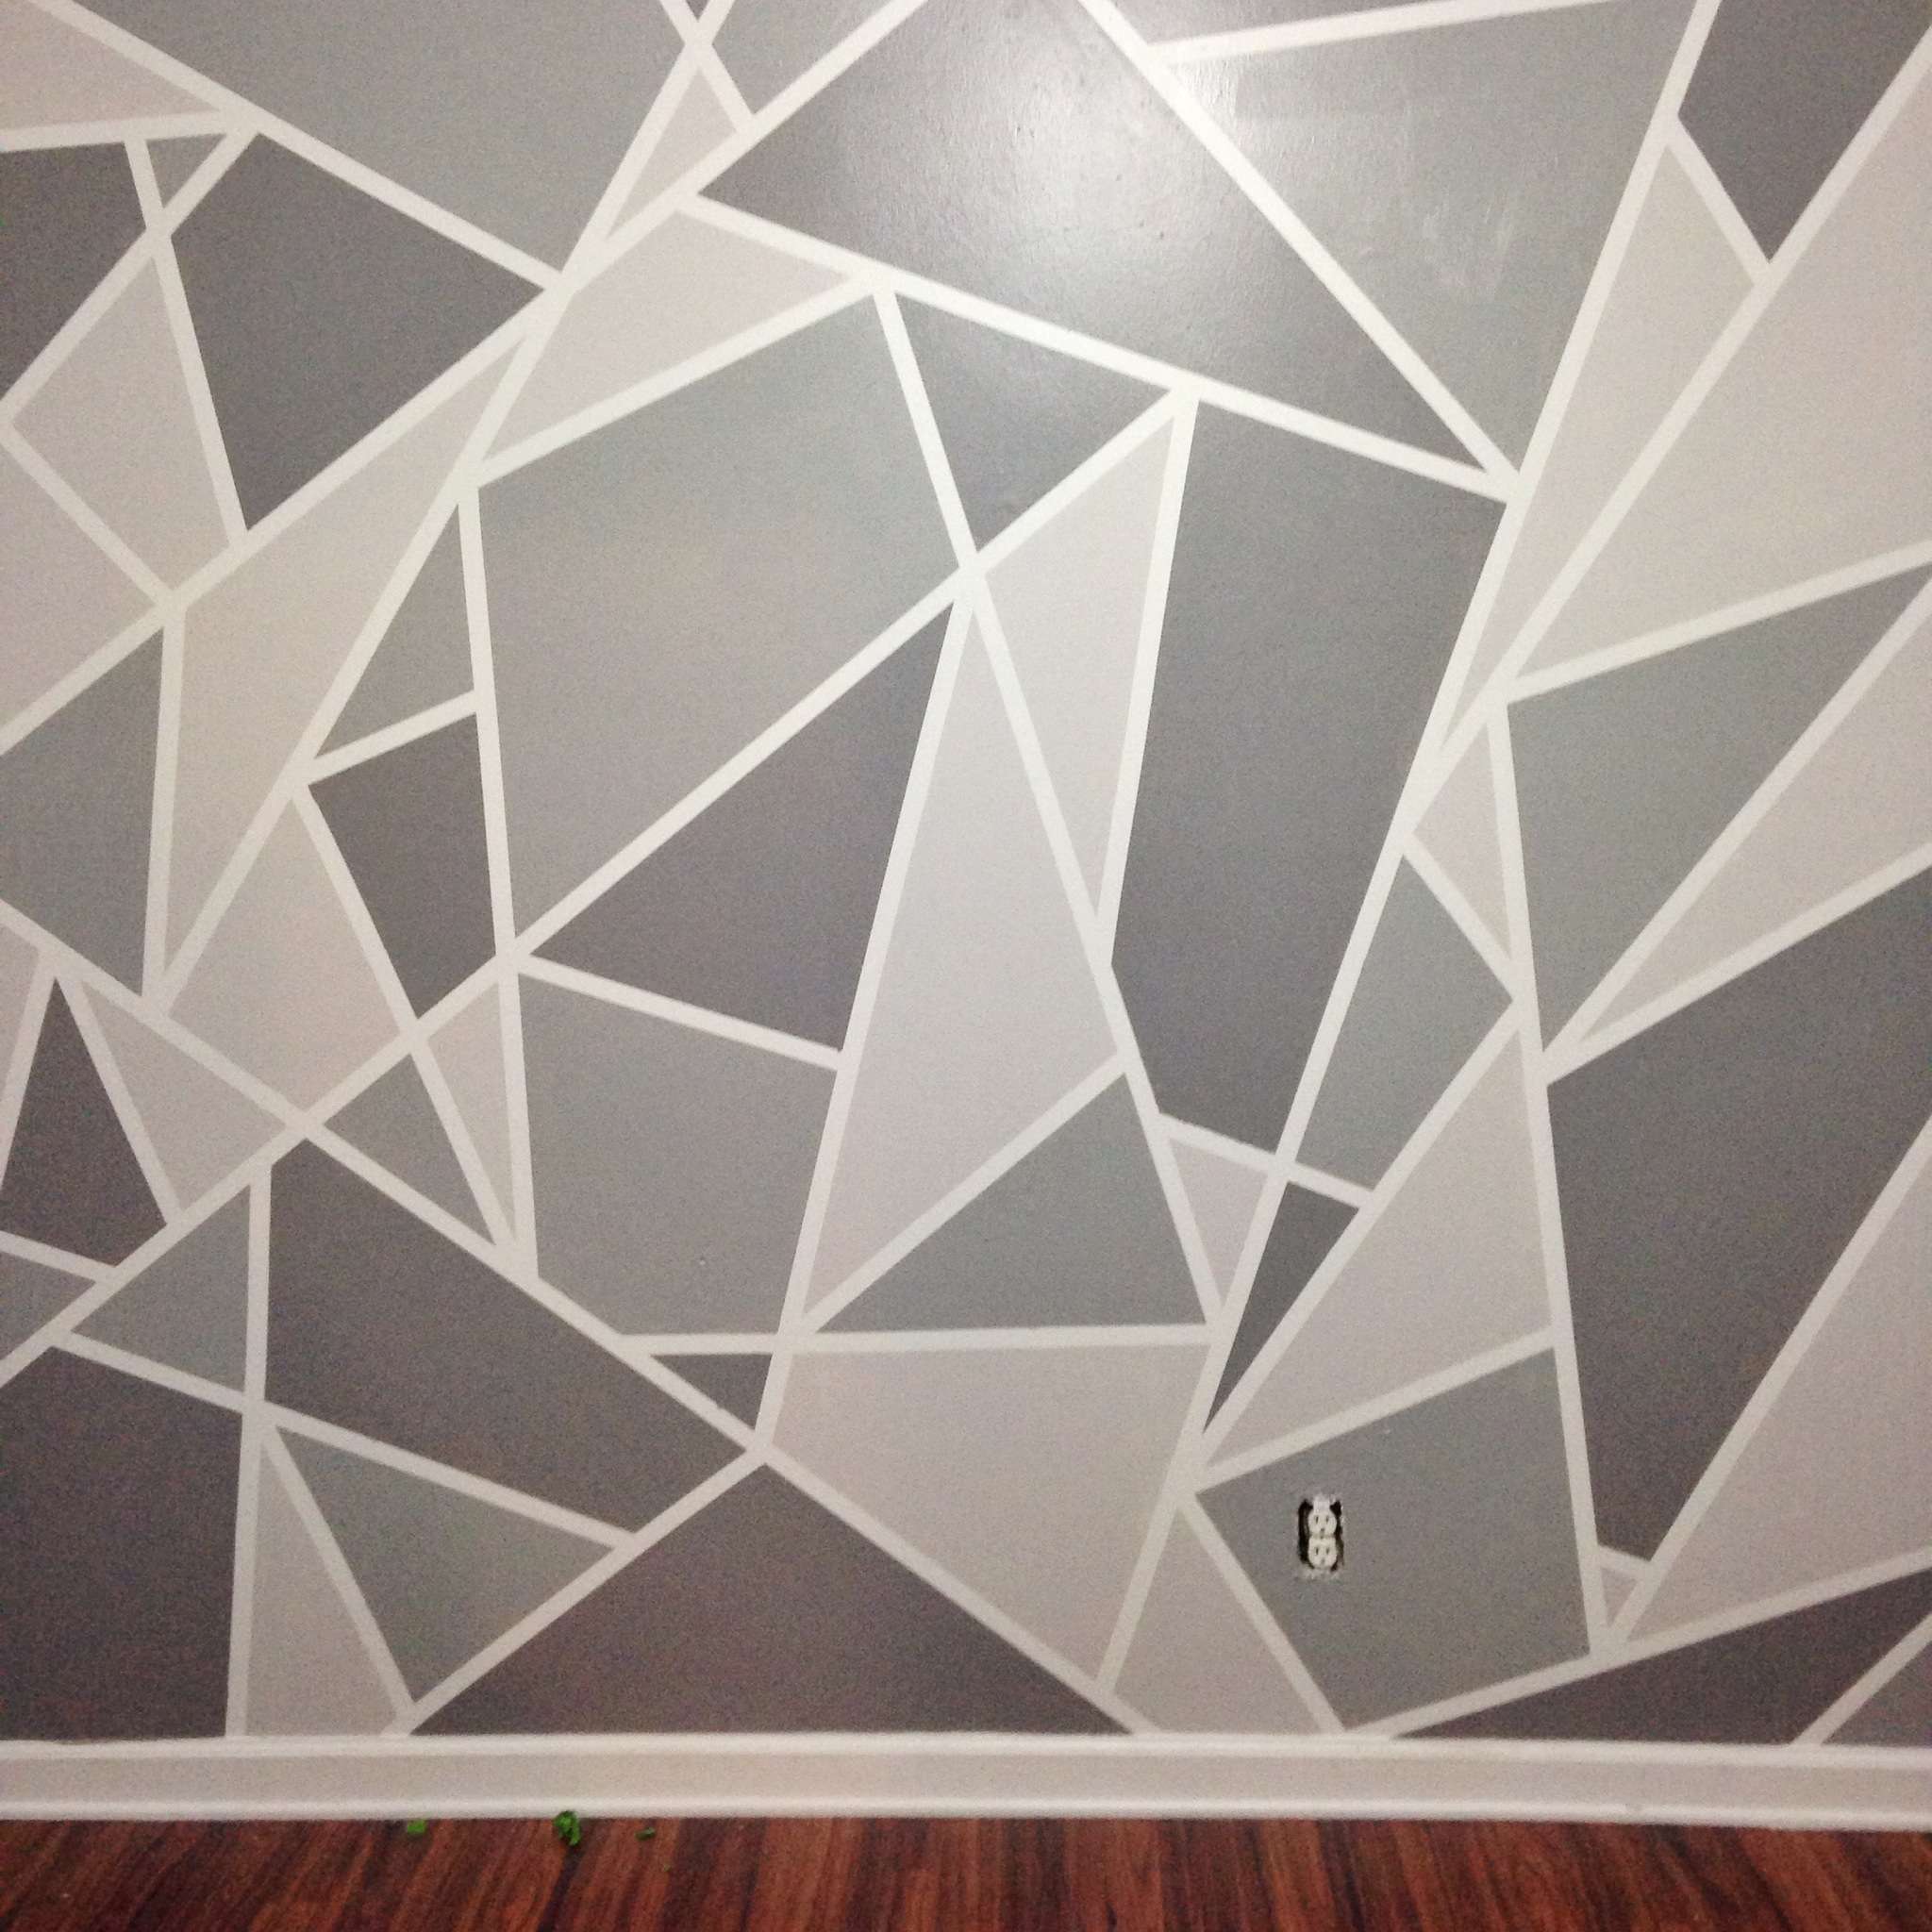
Be sure to pull off the
Frogtape about 10-15 minutes after you finish the last color. This way the paint is still a little pliable if you need to fix it a bit. The Frogtape did a good job for us but there were a few small spots we needed to touch up afterward.
Let your paint dry for several hours before attempting the glitter portion. It gets messy and you don't want the glitter falling into the other colors.
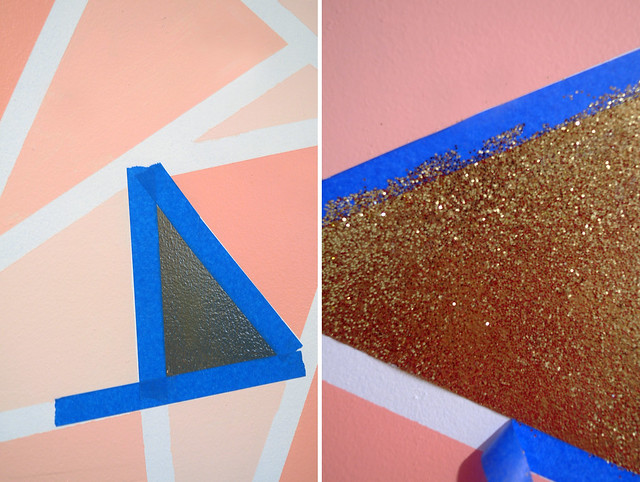
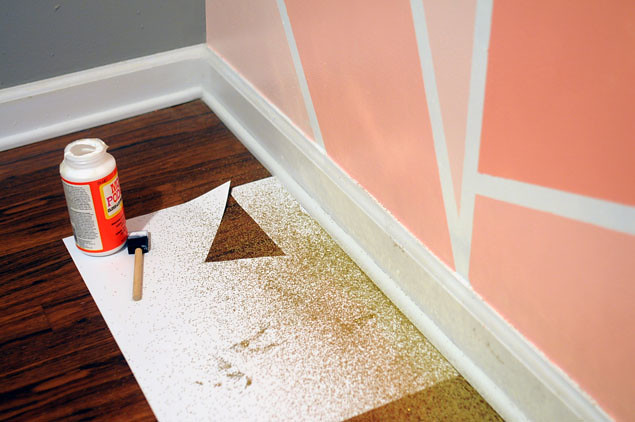
NOW! THE GLITTER! (Sweep your floor if you have hardwood! This way you can just sweep up the glitter and reuse it if needed) Grab some more
Frogtape and tape around the shapes you want glittered. It worked out well for us because our base was also gold so it didn't matter if the coverage wasn't even. If you can, I recommend matching the base paint and glitter, but it's not the end of the world if you don't! Now, dip your foam brush in the
ModPodge and give your wall shape a good coating of it. Not super thin, but also not so thick that it's runny. As soon as you do the
ModPodge on one shape, dump some glitter in your pie plate and fold it up a little bit. (You don't
have to fold it like I did, but I noticed it made a huge difference in the coverage on the wall!) Start at the bottom of your shape and blow the glitter onto the wall, moving side to side and upwards. You'll have to do it a couple of times for each shape, but don't worry, it's amazing how much it'll cover! Repeat as necessary on the amount of shapes you want and voila! Remove the
Frogtape and you have you a fancy, sparkly, glittered wall!

Hopefully that was easy enough to follow! I know many of you expressed your excitement at making a geometric glitter wall of your own. I've read so many awesome color palette ideas! I think the mint ombre + silver might be my favorite! (Well, second to my own of course haha!) Mike and I said that if we ever have a little boy we're totally going to do this with a grey wall. (And if we have a girl then voila! We've already got part of the nursery done! Dreaming way ahead there...!) Let me know if you end up giving it a go. I'd love to see some shots of your own walls! Good luck! xo


