Showing posts with label office space. Show all posts

// Office Space: 13 Small Workspaces with Personality


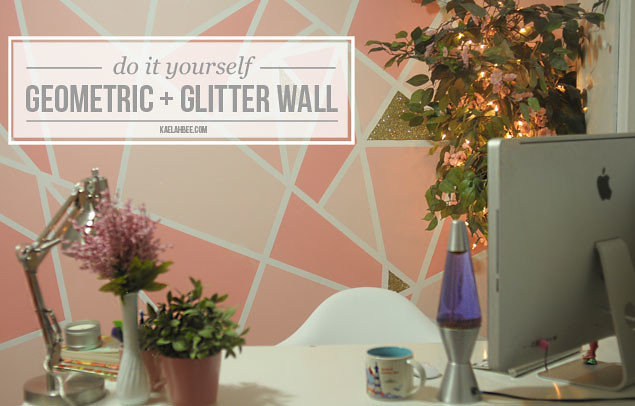
It's been about 6 months since I last shared some home office inspiration, and in those 6 months we've renovated our spare bedroom, turned it into an office, found out we were pregnant, scraped the glitter off the wall, and started to repaint for a nursery. It's been a busy half year! haha I was really aiming to make the entire room cohesive and relaxing, and I'd like to think it really worked for the few short months I was able to use it. By the time we found out we were expecting in early December I was zonked 24/7, so it really did only get used for a month or two (sadface!). While it's easy to be bummed about the geometric glitter wall we spent a lot of time and energy on, I'm actually enjoying my new (much smaller!) space in the kitchen. The way our kitchen is laid out is kind of weird, and I have a whole half wall for my desk and a few odds and ends. It's not the 12" x 12" room I had grown accustomed to, but my tiny 3' x 8' area is proving to be plenty big.

Organizing my workspace is a different animal entirely though. I tossed or stored probably 95% of the stuff in my office, and now I'm just working with a desk Mike built, my iMac, a lamp, and 2 cubby shelves that hold my business books. There's a window right behind my computer so that leaves very little vertical space to use, but I'm going to try and make the most of every inch of space. One of my biggest problems, however, is that I like to start cluttering it up if I give myself too much space... so it'll be a delicate balancing act.

Things I look for in the *perfect* workspace:
1. Lots of light! - I prefer natural light, but my workspace faces the North side of our house and I don't get a ton of sunshine over here. Luckily the area is fairly open and light tends to trickle in. It helps to have some custom blinds too, so that I can control exactly how much light I am letting in at any time.
2. Greenery! - I love having fresh flowers at my desk, but I also supplement them with some fake Ikea succulents. I'm hoping to find a way to bring in live greenery. I love the look of ivy draped around the work area.
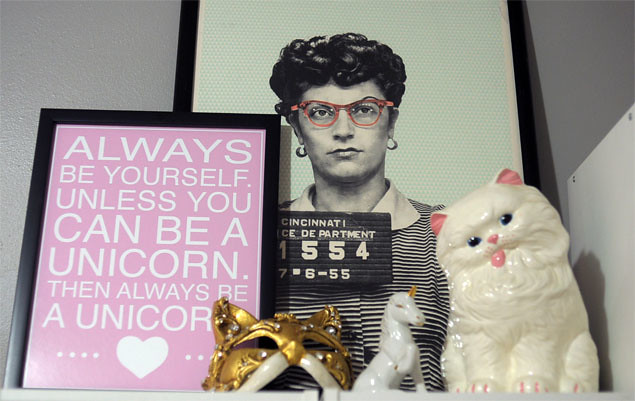
3. Color! - I'm into the cliche interior trend of white (or very light) environments, dotted with colorful pieces. Whether it's office supplies or artwork, I like there to be "pops" of color (I know, so overdone!)
4. No drawers! - Maybe it's silly to admit this, but if I have drawers to put things in, I'll put everything except what belongs in there. I'm not organized enough to be given the responsibility of desk drawers or filing cabinets, despite loving the look. 

We're eyeball deep in redoing my workspace, our bedroom, and planning the nursery. We've been in our home for over a year now and it's so crazy to me that the bathroom is only like 75% finished. We really are racing the clock over here... 

If you have any great resources for small workspace organization or planning, or even just some cute office products (!!!), I'd love to see! 

And now one final question: What's the one thing (or three!) that you do to help make your workspace feel more "you?" Whether you work in a cubicle or in a closet at your home, hunched over a laptop or tinkering away with your hands, how do you ensure you feel at home in your space? My answer: I try to have fresh flowers around as much as possible. I have some really nice silk/Ikea ones that do the job when I forget! Little pops of color help distract my eyes from my bright computer screen.

sources: 1 // 2 // 3 // 4 // 5 // 6 // 7 // 8 // 9 // 10 // 11 // 12 // 13

// DIY Geometric Paint + Glitter Wall

Kaelah Bee : Office Makeover - Geometric Glitter Wall DIY
Okay! I'm so stoked on how excited y'all were about our geometric glitter wall! Seriously I've been dying to share this project since we did it and it's so easy! I think everyone should have a glitter wall in their house but I'm obviously super biased so whatever. Let's talk about a few things first, yeah?

Before you dive head first into adhering glitter to your walls, ask yourself these questions:
  1. Are you the type of person who will go bonkers if you have glitter stuck to you after 3 days/showers?
  2. Does the thought of finding more glitter in your bra than on the wall freak you out?
  3. Does the room you want the glitter wall in have carpet?

If you answered yes to any of those questions, you might be best just sticking to the geometric flat paint or opting for a glitter paint (Martha Stewart has one!). You can get around #3 by laying down a slick dropcloth (don't do a canvas/fabric one!) but seriously, don't blame me if you're stuck with glitter in your carpet forever! That's my disclaimer! Real glitter ends up looking so much better than a glitter paint in my opinion.

But really, you will find glitter everywhere. In your bra. In your hair. On your eyelids. And quite possibly your underwear. I don't know how it got there either. Maybe wear a turtleneck if it gives you the heebie jeebies. Picking tiny pieces of glitter off of yourself for a week is so worth it! I promise.

Okay... now the part you've been waiting for! Let's get geometric!
Office Makeover DIY Geometric Glitter Wall - KaelahBee.com
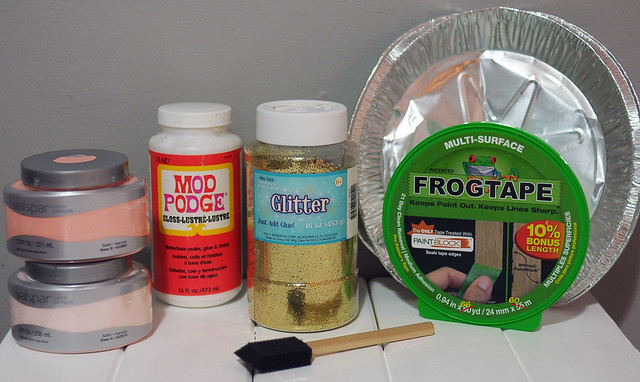
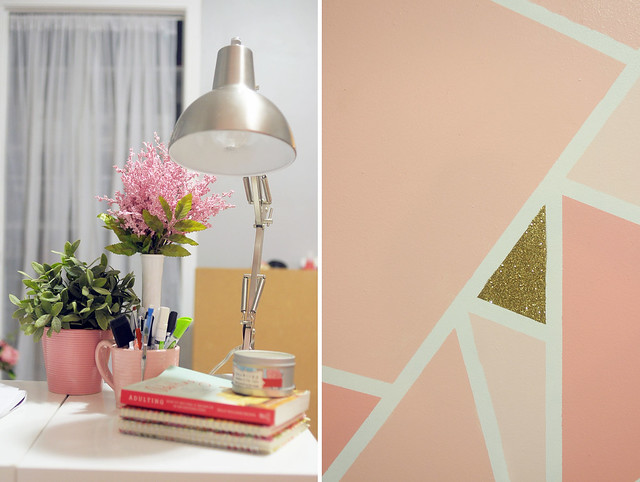
I was totally serious when I said this wall cost us around $15. Granted we had the glitter and ModPodge already, but it doesn't take much at all. We painted an 8x11' wall and had plenty of paint leftover afterward. We picked a Valspar paint swatch with 3 colors on it and just had the lady at Lowes mix up a sample size ($3!) of each color. We knew these shades would work well together since they came from the same swatch card. (Our colors are: Baby Blush, Peach Whisper, and Peach Punch)

SUPPLIES:
Satin finish paint in the colors of your choosing (we used 3 colors + a metallic spray paint)
ModPodge (Gloss)
Glitter
Foam brush
Aluminum pie plate (or paper plate)
Frogtape (we used .94")

INSTRUCTIONS:
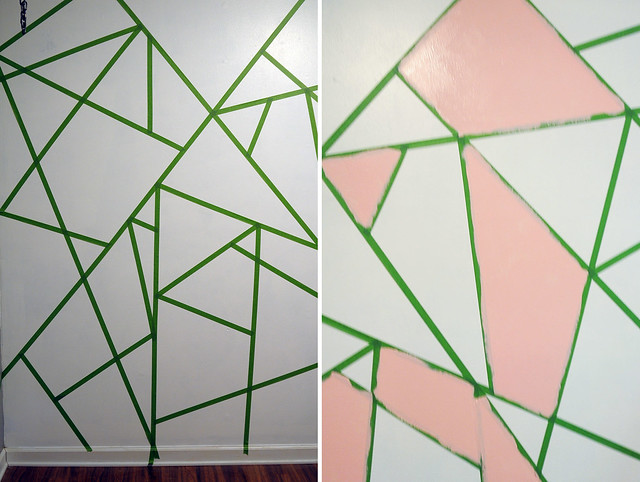
Get crazy with your Frogtape! Whatever shapes and lines you want, slap that sticky stuff on! We had no rhyme or reason to our design, but we started with larger diagonal lines and then just built off of them. To be honest it's sort of a blind project where you have no idea how it'll turn out until it's done. We were skeptical, too, but now we are believers!

Once you've laid your Frogtape down, decide what color will be your "median" color and paint those first. We painted our medium pink to start, then we painted the lighter and darker shade at the same time. We just eyeballed what we thought would look good and went for it. You can always fill "holes" with the median color, too. You'll start to see how it all works together once you get 2/3 of your wall painted.

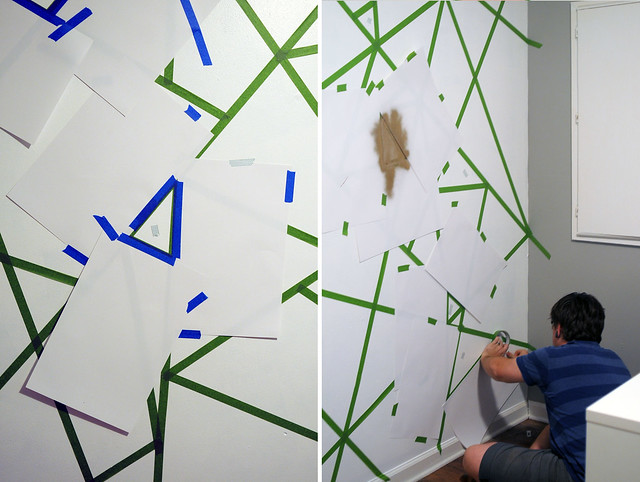
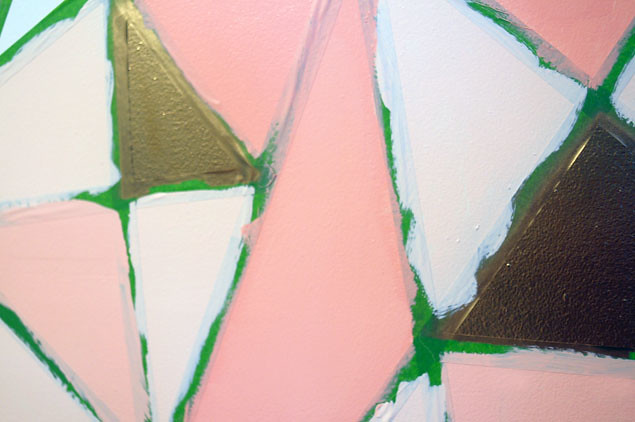
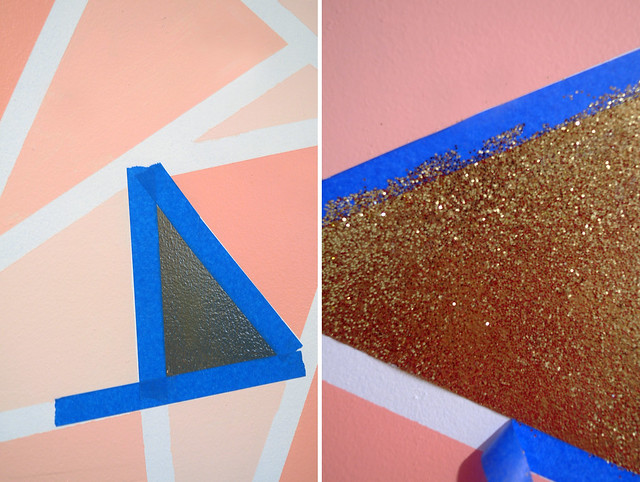
Our photos are a little out of order considering we opted to do gold spray paint on a few shapes first. The metallic paint fell a little flat for us so that's where the glitter came in. If you want to do the spray paint, just be sure to cover up the shapes around it with paper first. The smell of spray paint in your home should be enough to make you not want to do it, but hey, it's a lesson learned! All ideas can't be good ideas, right?

Be sure to pull off the Frogtape about 10-15 minutes after you finish the last color. This way the paint is still a little pliable if you need to fix it a bit. The Frogtape did a good job for us but there were a few small spots we needed to touch up afterward.

Let your paint dry for several hours before attempting the glitter portion. It gets messy and you don't want the glitter falling into the other colors.

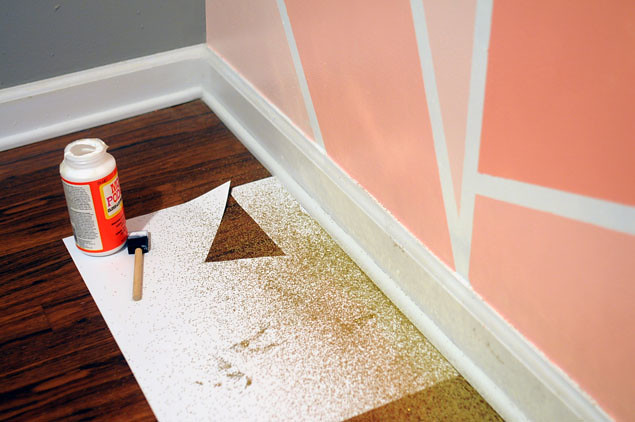
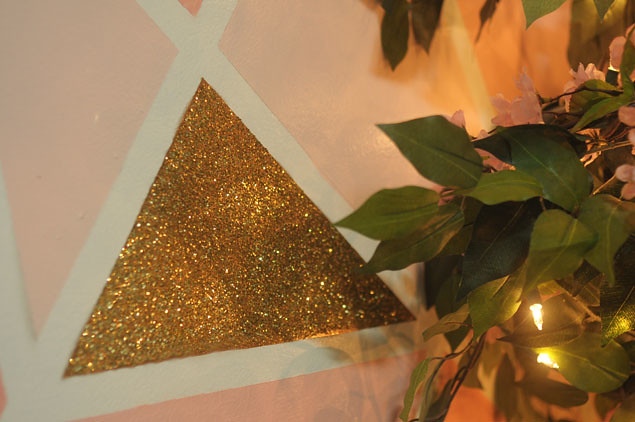
NOW! THE GLITTER! (Sweep your floor if you have hardwood! This way you can just sweep up the glitter and reuse it if needed) Grab some more Frogtape and tape around the shapes you want glittered. It worked out well for us because our base was also gold so it didn't matter if the coverage wasn't even. If you can, I recommend matching the base paint and glitter, but it's not the end of the world if you don't! Now, dip your foam brush in the ModPodge and give your wall shape a good coating of it. Not super thin, but also not so thick that it's runny. As soon as you do the ModPodge on one shape, dump some glitter in your pie plate and fold it up a little bit. (You don't have to fold it like I did, but I noticed it made a huge difference in the coverage on the wall!) Start at the bottom of your shape and blow the glitter onto the wall, moving side to side and upwards. You'll have to do it a couple of times for each shape, but don't worry, it's amazing how much it'll cover! Repeat as necessary on the amount of shapes you want and voila! Remove the Frogtape and you have you a fancy, sparkly, glittered wall!

Office Makeover DIY Geometric Glitter Wall - Kaelah Bee
Kaelah Bee : Office Makeover - Geometric Glitter Wall DIY
Hopefully that was easy enough to follow! I know many of you expressed your excitement at making a geometric glitter wall of your own. I've read so many awesome color palette ideas! I think the mint ombre + silver might be my favorite! (Well, second to my own of course haha!) Mike and I said that if we ever have a little boy we're totally going to do this with a grey wall. (And if we have a girl then voila! We've already got part of the nursery done! Dreaming way ahead there...!) Let me know if you end up giving it a go. I'd love to see some shots of your own walls! Good luck! xo


// Office Space: Makeover Sneak Peek

Workspace makeover glitter geometric wall DIY
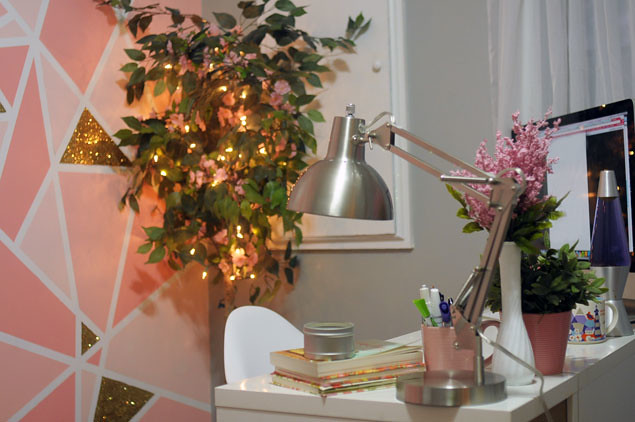
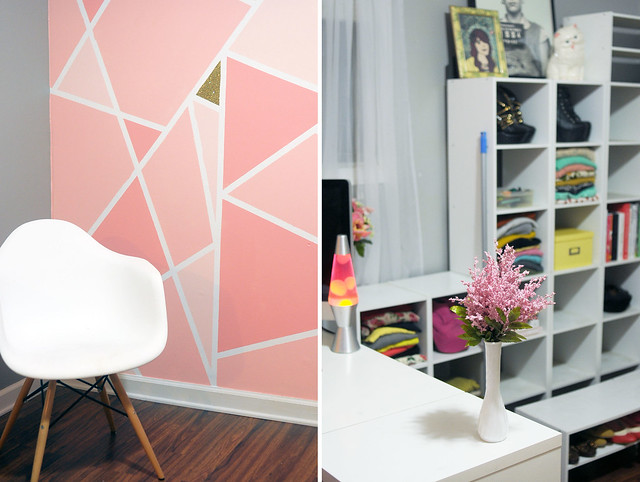
Huzzah! Our office makeover is well on it's way and we couldn't be more excited! Here's a little sneak peek at what we've been up to... a GEOMETRIC WALL! WITH GLITTER! Originally we started with just metallic gold paint but they fell flat and just looked brown since they weren't constantly lit up. Mike thought I was totally bonkers when I suggested we do glitter on top of the gold. He kept shaking his head and I'd just murmur "Watch me... I'm going to have a glitter wall." Once we were done with the base paint I set out on my mission... and it worked! I was pretty shocked at how easy it was honestly. Mike was pleasantly surprised, too. 

I know what you're thinking... "That doesn't look like an office for a man..." but whatever. Mike was stoked on my idea of the geometric wall (inspired by this painting that I've had in my favorites for like ever!) and he was totally game for the color palette I picked out. I'm letting him nerd out and build most of the furniture (two tables for the wall behind us, and his desk, for starters) so it's been a fun collaboration. I think he's just so stoked to have all of those clothes tossed out of the room that he doesn't care much. Anything was better than that!

You'll have to excuse the wonky color/lighting in photos 2 and 3b. We changed the bulbs in our light from incandescent to "natural"CFL bulbs mid-makeover. Things photograph so well in our office now that we've changed the bulbs. It "feels" a little blue since all of our other lights are yellow/incandescent, but we're considering swapping them all out to match. The colors in 5a (the last photo) are true to life, and they're gorgeous! Seriously, I never thought I could be so inspired by an ombre, geometric, glitter wall (say that five times fast!) but I am. I just want to sit in our office and make magic happen!

We have a lot of work left to do though. Today we're attaching all of our cubby shelves and adding backs to them (which we're going to paint a contrasting color) and putting together a new bookshelf. Not to mention painting Mike's new desk and starting to build the two tables. My desk was the first to get set up since I have several design projects to work on, and even in it's current half-renovated state, I'm feeling super motivated. Just knowing what it looked like before is insane! Having all of those clothes gone seriously feels like a weight lifted off of my shoulders. Here's to hoping we don't clutter this place up!

If you're a fan of the geometric/glitter wall, pop back by tomorrow and I'll show you exactly how we made it happen! (Real talk: our statement wall cost us around $15!) Is it totally looney that I never want to live anywhere without a geometric/glitter wall now?! I'm hooked!
Workspace makeover glitter geometric wall DIY
Kaelah Bee : Office Makeover - Geometric Glitter Wall DIY
Workspace makeover glitter geometric wall DIY
Kaelah Bee : Office Makeover - Geometric Glitter Wall DIY
Thanks for letting me share my excitement with you! Happy Monday!

// Office Space: 15 Chic Home Offices

15 chic home office ideas and inspiration - kaelahbee.com
Mike and I are in the process of overhauling my "studio" in order to make it our office. He went above and beyond to hang my huge industrial wardrobe from the attic's rafters, drilling holes in the ceiling and all, only for me to nix it six months down the line. Honestly I've just felt really bogged down by all of my "stuff" lately. Too many dresses, too many pairs of shoes, too many purses, etc. I think it's easy to fall into that trap as a blogger. I've thrown out nearly half a dozen bags of clothes so far, and I've only just started. I want to make room for us to brainstorm, build, and be productive. I've been working out of the kitchen for the past month or two because I just couldn't get anything done when I was surrounded by all of that junk. Some of it will go to storage, some of it will get heaped into a yard sale pile, and the rest of it will just get tossed or donated. I'm sort of sad about it in a way, but also super relieved. It's kind of weird to put emotions to silly old clothes, but I guess that's a song for another post!
15 chic home office ideas and inspiration - kaelahbee.com
Today's post is a happy one! An organizational wonderland! The idea is to overhaul the office for as little dough as possible. I'm really fickle about my surroundings so I don't want to sink hundreds or thousands of dollars into something I may not love, ya know? We've got a huge town-wide yard sale coming up in less than 2 weeks and I know we'll find some great things for our new office there. We're going to hunt down a second desk, some chairs, and hopefully some bits and bobs to tidy up the space. In the event we can't find exactly what we need, we're hoping we can just build it. I'm really inspired by light, airy colors and accent walls. I'd love to put down a rug and do some bold paint on the big back wall. I also want to incorporate as much light as possible since natural lighting is hard to come by in our home.
15 chic home office ideas and inspiration
15 chic home office ideas and inspiration - kaelahbee.com
I've been scouring Pinterest for some inspiration so I can have an idea of what to look for at yard sales and shops. Right now we're leaning toward doing one wall as an accent wall for the room, then leaving the others light grey or white. There's not a single white wall in our house so that could feel strange, but I know it'll be nice to brighten up the space a little. Designing a space for yourself is really hard in my opinion. Whether it's for your home or for your blog, I think it's really difficult to get inside your own head and then execute your vision. At least I know it is for me! I feel like I "grow" a little bit each time I attempt to tackle such a challenge. These 15 home offices are definitely giving me some ideas though!
15 chic home office ideas and inspiration - kaelahbee.com
15 chic home office ideas and inspiration
15 chic home office ideas and inspiration - kaelahbee.com

I'll undoubtedly be back with more inspiration posts and maybe even a moodboard for the direction we're planning on going in. I know the space will be much more successful if I put forth the effort to really dissect my wants and needs in an office space. Plus who doesn't love buying adorable little office supplies?!

Do you have a home office? Or any words of wisdom on where to get the best organizational items and decor? Share your favorites with me!

credits: 1 // 2 // 3 // 4 // 5 // 6 // 7 // 8 // 9 // 10 // 11 // 12 // 13 // 14 // 15