// Starburst

Starburst - Kaelah Bee
Unpopular things to say on your own blog: "I feel stuck." I don't know if "stuck" is the right word to use, but we're using it for the sake of the conversation. Being open and honest about that is really weird and it makes me feel really exposed in a way. No one wants to feel like they're a stranger in their own space ya know? I know it's probably just a funk, and I'll ride out the wave, but I don't think this sort of thing gets discussed a lot. Surely I'm not the only one who feels that way right? I think we all go through these lulls with our creative endeavors and sometimes it's hard to feel fulfilled 100% of the time. I don't have any plans to leave the blog or anything, but it does make me feel more pressure to make some changes. I've been talking (very vaguely) about changes for months and months now, but I just haven't managed to work out the details yet. If we're being totally honest here: I haven't found a way to really balance my content. I love sharing outfits, even if they're not unique or inspiring (I like what I like haha). I love sharing DIYs and tutorials, but it seems only the "(too) simple" things make waves (Hey! I like the easy route, too!). I love sharing things about Toby and being a mom, but I don't want to teeter too far into mommy-blog territory (and I never want to exploit him for pageviews). I think personal blogs are sort of weird territory. How much is enough, and how much is too much? I get bored thinking of my own blog sometimes and that's kind of the worst thing ever haha! (And I can't believe I'm admitting that, but ya know...)
Starburst - Kaelah Bee
I honestly think a lot of this has come about in my sort of semi-quarter-life crisis that's going on. Then again I have one of those like every few months! haha It's not just the blog that has me sort of singing the blues. Mike and I have really been trying to hammer out what it is we see ourselves doing in the long run, and how we plan on achieving that. I know I shouldn't harp on myself so hard for not being "there" yet (wherever the heck "there" is!) but sometimes I really get into that mood where I want to get busy living. One day I'll feel so adult and think I have it all together, then the next day I'm convinced I'm a 12 year old in a 25 year old's body. I think that's an honest struggle for a lot of self employed people. Trying to have faith in your vision and really investing it in to see you through the times is tough. Oftentimes it's so much easier to just look at what everyone else is doing and say "Huh, why can't that work for me?" I've started writing multiple blog posts on this sort of "mindset" and hopefully one day soon I'll finish them. I think it's a great conversation to have and I'm convinced that so many people out there can relate. I know what I need to do to really put the pep back in my step, but it's like I keep hitting that virtual brick wall. The only way to work through it is to just slowly chip away at it. I think a nice little day drive or adventure is in store for me to clear my head. I'm basically waxing poetic about a blog... what is my life?!
Starburst - Kaelah Bee
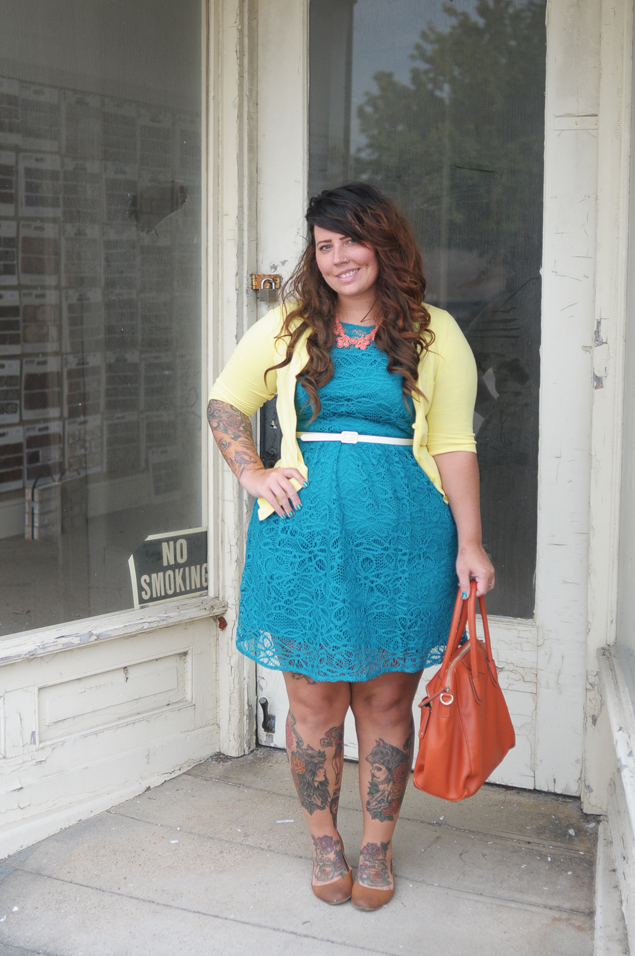
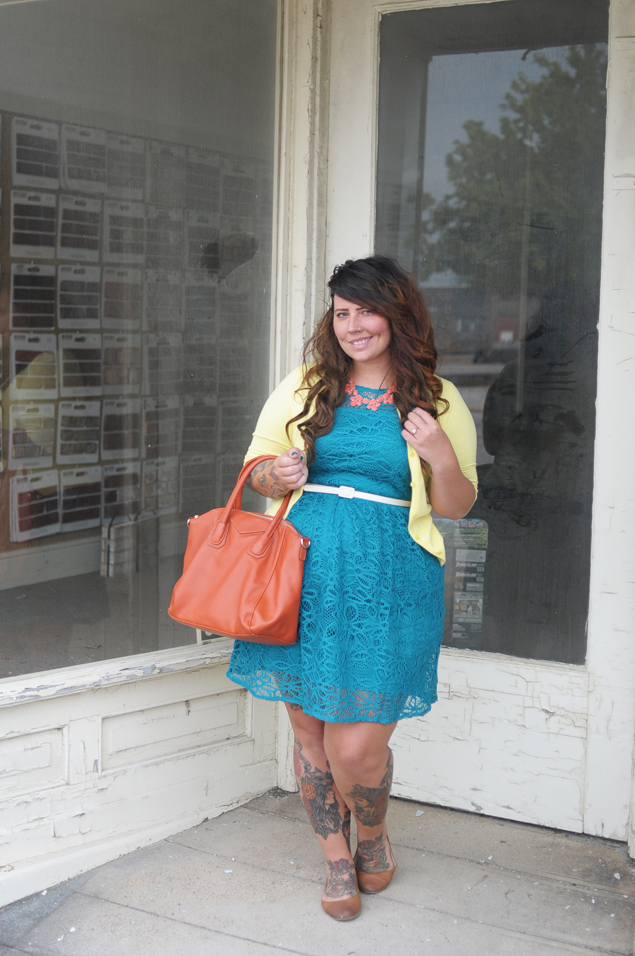
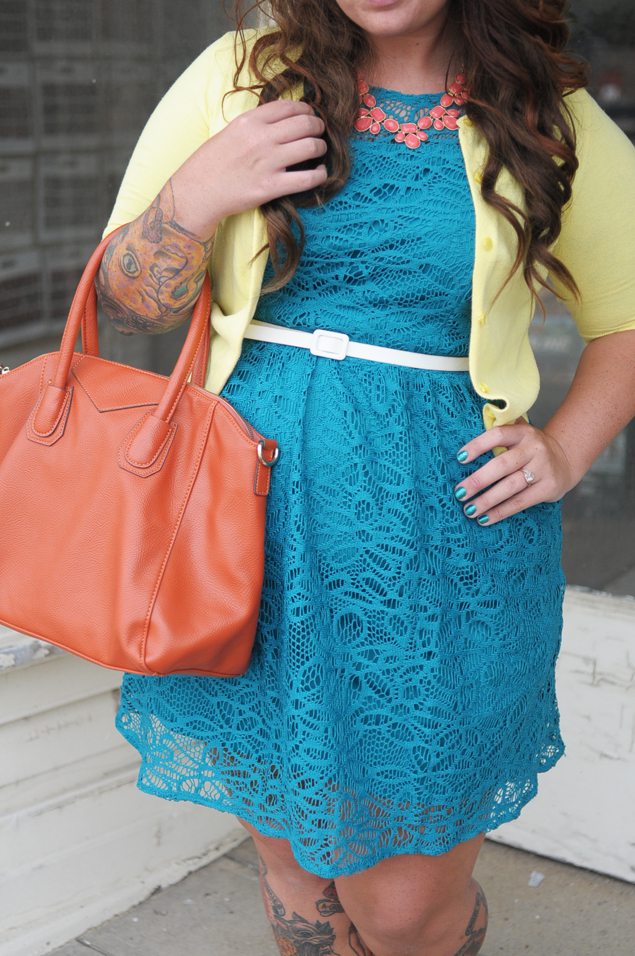
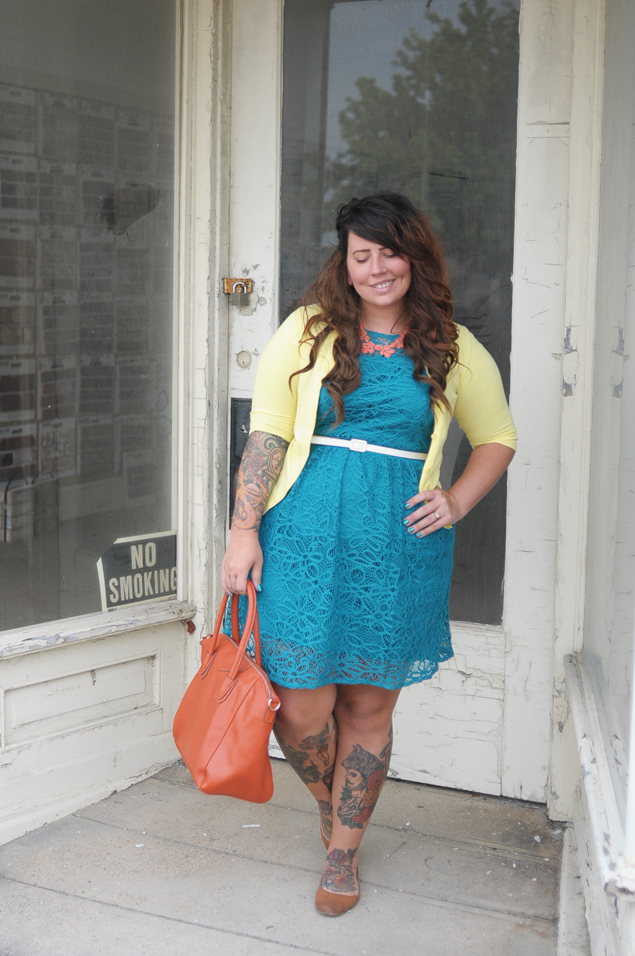
This outfit looks familiar huh? (Not unlike all of my other dress + cardigan combos haha They're basically indistinguishable from one another.) Here I am rocking the same dress from here and here, but with some different colors thrown in. Maybe it's a safety thing, but I feel so comfortable in these outfits. This JCP dress (along with the purple one) are seriously the best things to pair with my bright colored cardigans. I instantly feel put together and classy enough to go in almost anywhere, but I'm also so confident and comfortable (and I still feel modest/covered up).

Today I'm planning on getting my hands dirty by building some photo props with Mike. I've spent the past few days trying to catch up with life after being out of pocket all last week, and I think some sunshine is just what I need. If you've got the answers for all of my life questions, I'm all ears! ;)

Studio One dress via JCPenney
Worthington cardigan via JCPenney
Coral necklace c/o LuLu*s
Maja bag via Little Black Bag
Target flats

// DIY Kids' Art Easel

easel7a
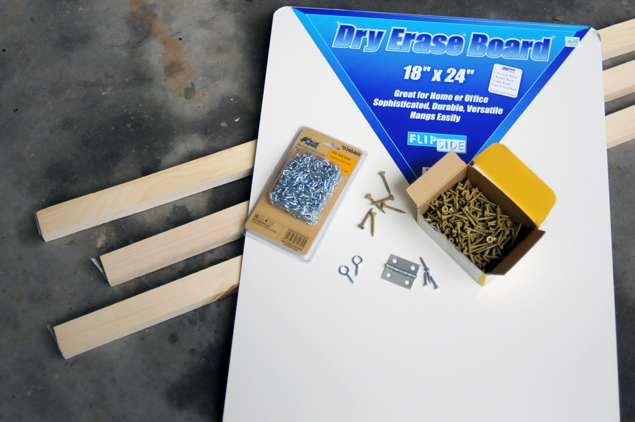
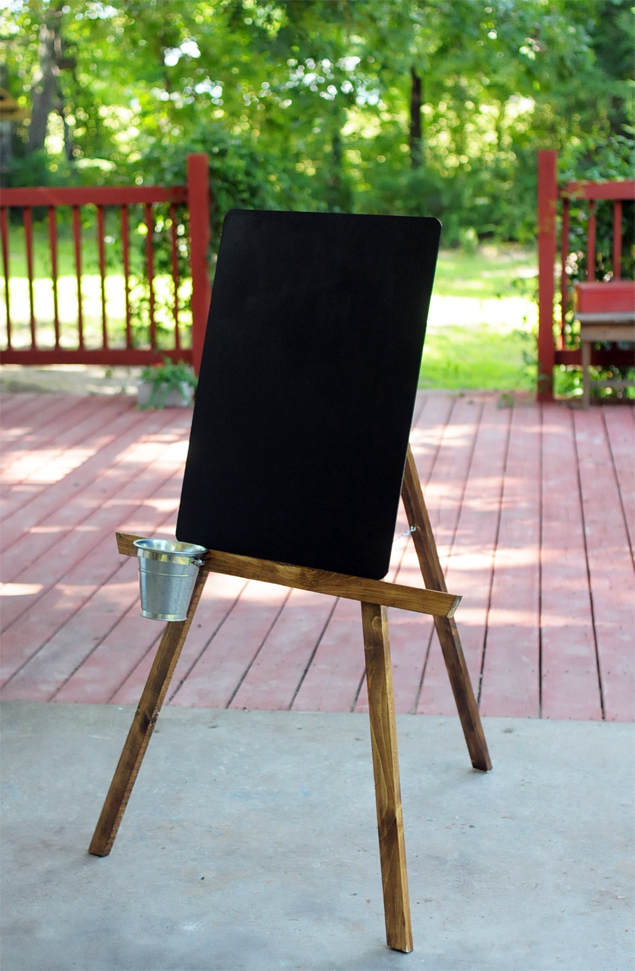
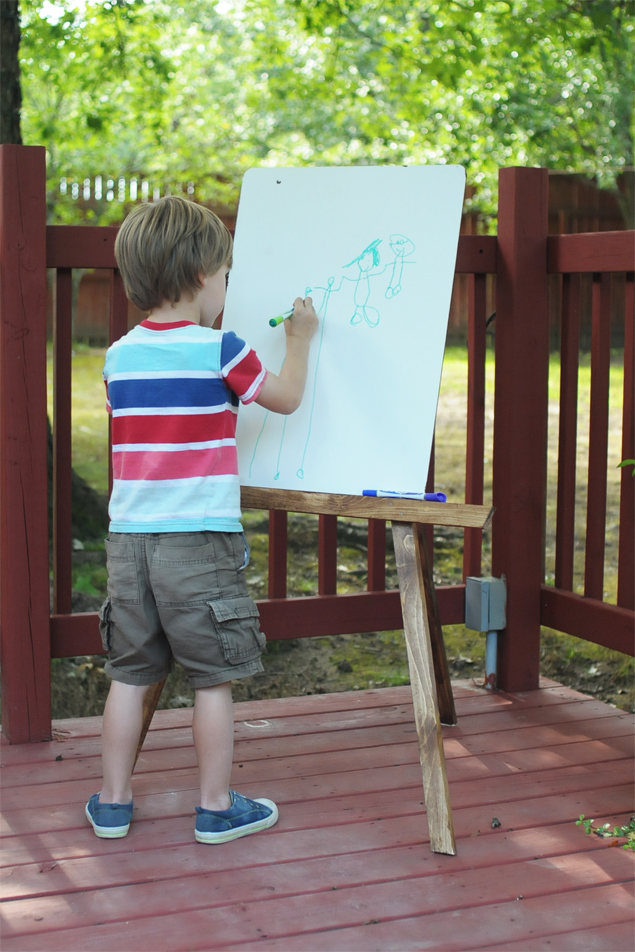
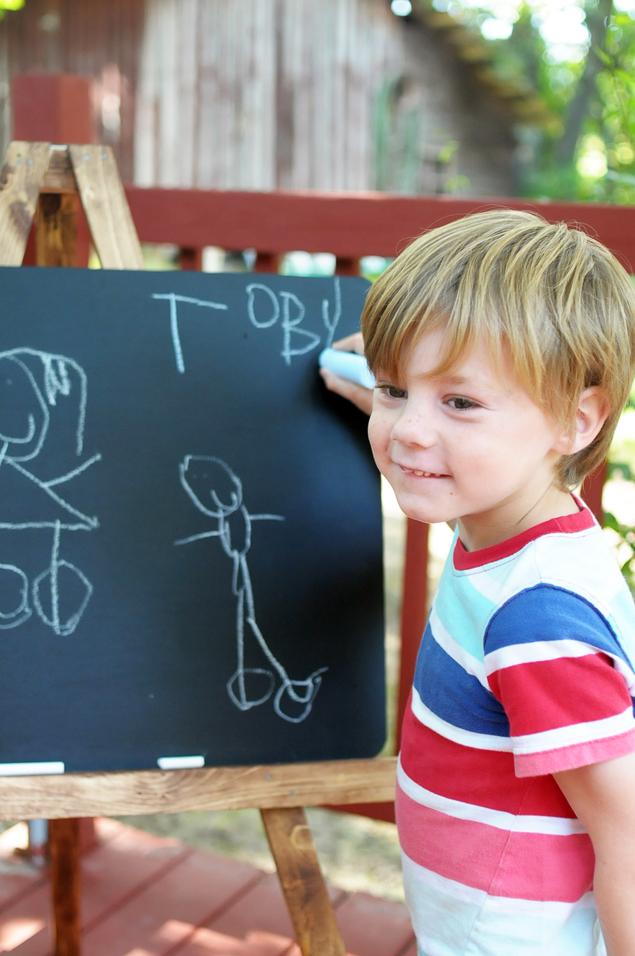
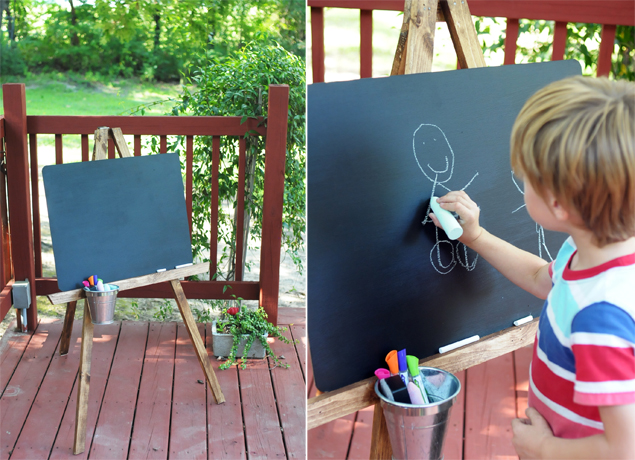
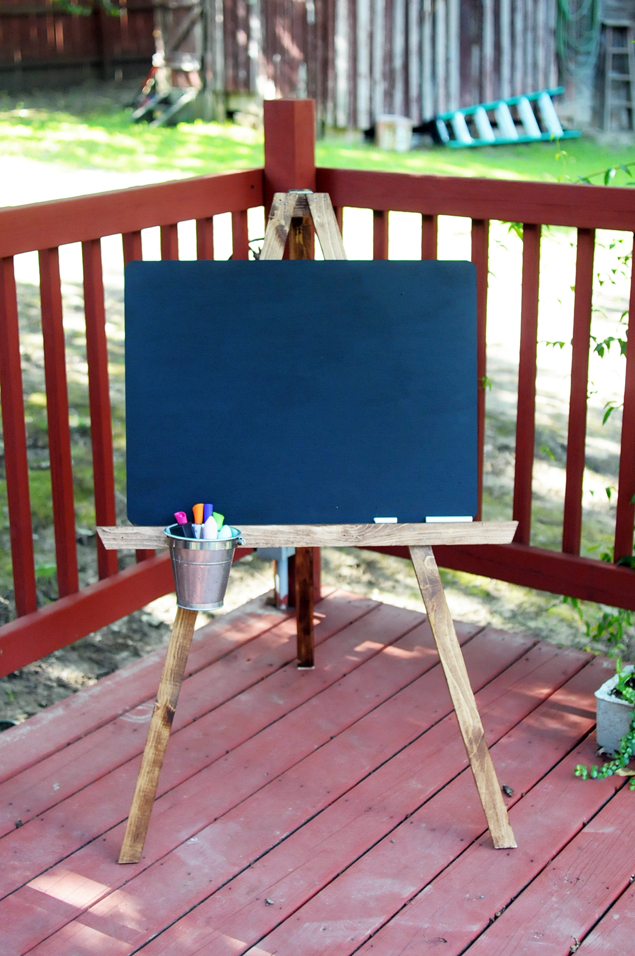
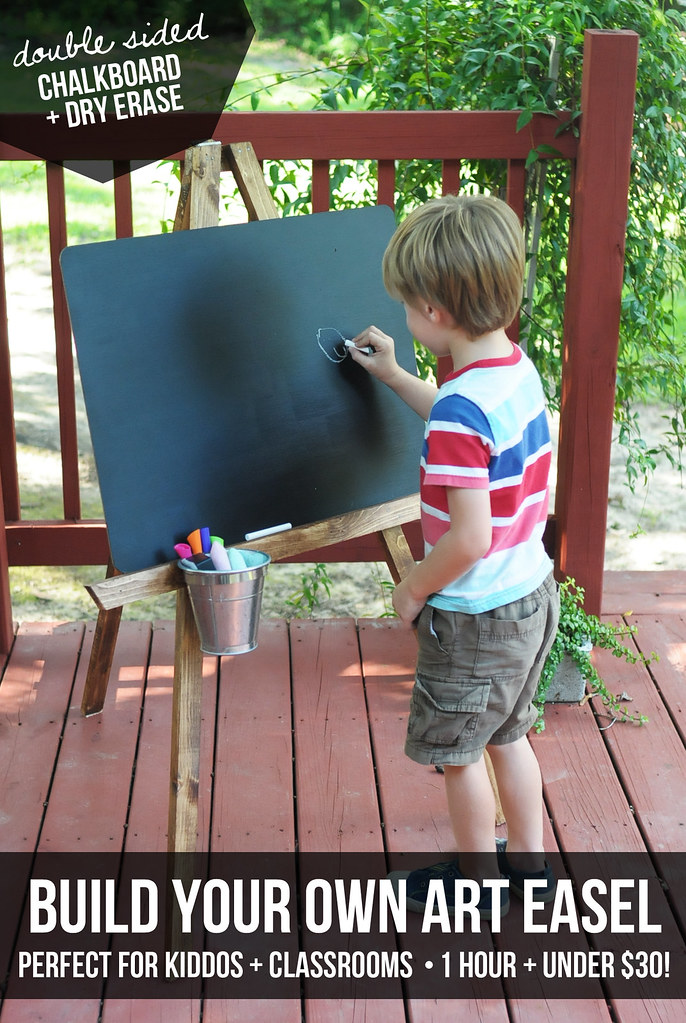
Toby loves writing on chalkboards and dry erase boards. He does his best learning when he's able to freely write and express himself. We had been toying with the idea of getting him an easel for his bedroom, but most of manufactured ones we saw were either too childish and plastic, or they were too big and bulky (not to mention expensive!) We decided we'd build him one ourselves in order to save money and space. We're tickled with how it turned out, and we're also amazed at how simple it was to put together. Toby absolutely adores it, and I think it might be a great addition to your kiddos' room or maybe to your classroom! We planned to use a thin plywood for the writing space, but we actually found an 18x24" dry erase board at Hobby Lobby for $8. We used a 40% off coupon (found on their site!) and got it for about $5. I had some chalkboard paint lying around so I just painted the back of the dry erase board. You'd never know I didn't buy it that way. You can't beat that! Here's what we did...

Supplies Needed:
Two 6' 1x2s
One 8' 1x2
1.25" screws
One small hinge
Two eye hooks
Chain
Dry erase and/or Chalk board

* The shape and size of this easel is based on an 18x24" chalk board and a Toby. If you have a different size board or user the height should easily be adjustable without changing any of the angles by adding (or removing) length to your legs, head piece and cross bar. 

Cut List:
Two 48" legs with 15 degree cuts 
One 48" leg with straight cuts
One 3.5" head pice with 15 degree cuts
One 28.5" cross bar

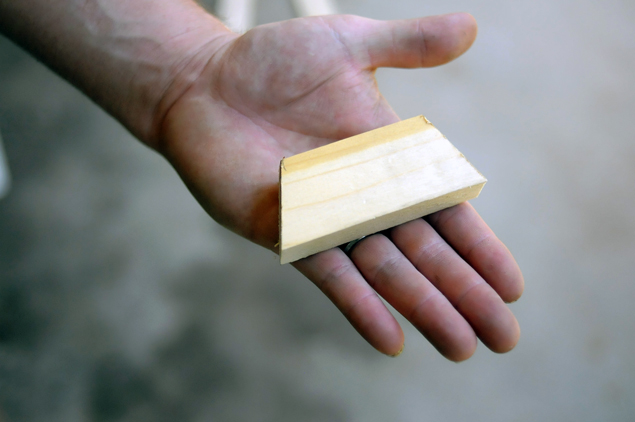
* Just a quick tip: the two front legs should end up being very long parallelograms. The cuts are made in the same direction each time, whereas the connecting "head" piece should be a trapezoid. The pictures should explain it well enough though!
DIY Kids' Art Easel - Kaelah Bee
First cut your head piece. This piece will join together your front two legs at the top. You want non-parallel 15 degree cuts (aka a trapezoid). The short side of the board should measure 3.5".


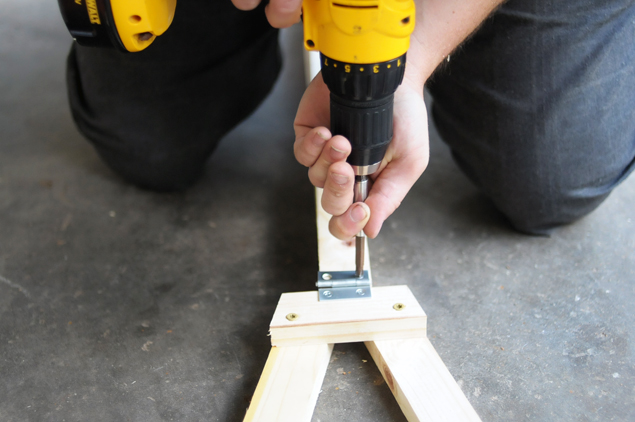
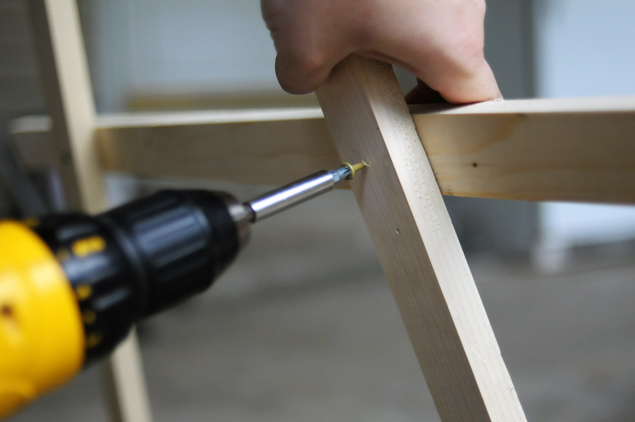
Next cut your two front legs. These should have parallel 15 degree cuts. They should measure 48". Line up the legs with the head piece and secure them in place with screws. 

Now attach the hinge to the top center of the head piece. Then attach your remaining leg to the other side of the hinge.
DIY Kids' Art Easel - Kaelah Bee
easel7
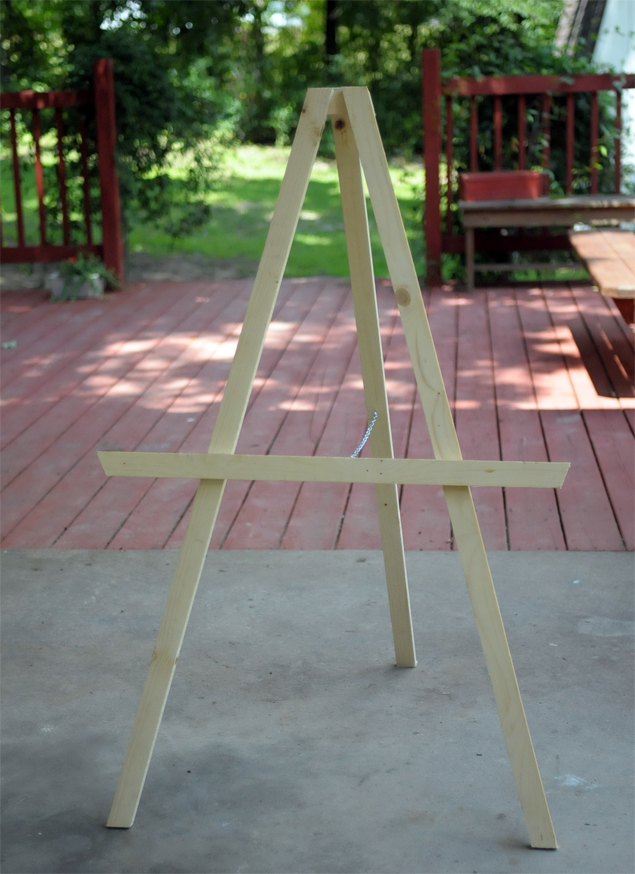
Stand your easel up and measure 22" up from the bottom of each front leg and make a mark. This mark will be the bottom of your cross bar. The cross bar should be attached to the front of the easel and on the opposite side of the head piece. Screw it together from the back of the legs. We cut our cross bar with 20 degree ends just for looks. Straight cuts would work just the same. 

Initially I secured each joint with one screw. It wasn't quite as solid as I wanted. Since there wasn't enough room for additional screws I put a couple of small nails in each joint. It really helped stiffen it up so I would recommend doing the same. 

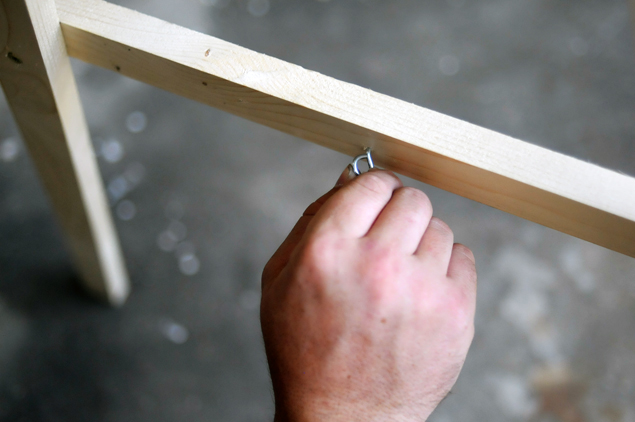
Now drill a hole in the back center of the cross bar and thread in your first eye hook. Do the same thing the back leg at about the same height as the first one. It doesn't have to be perfect, just close.

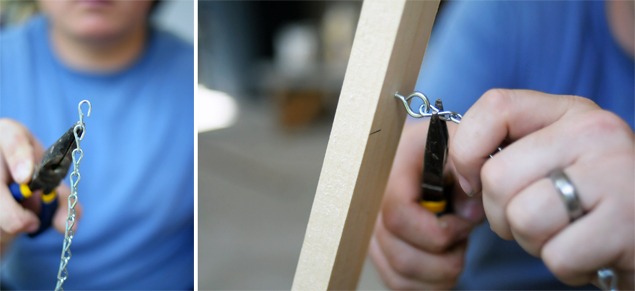
Now spread the legs of the easel out to where you want them to sit. You want them spread out enough so that it is good and stable. Hold your chain up and to see how long you need to make it. (note: when buying your chain make sure you will be able to easily open and close the links with pliers.) Using pliers open up the link a little and slip it on the eye hook. Now just crimp it shut. 


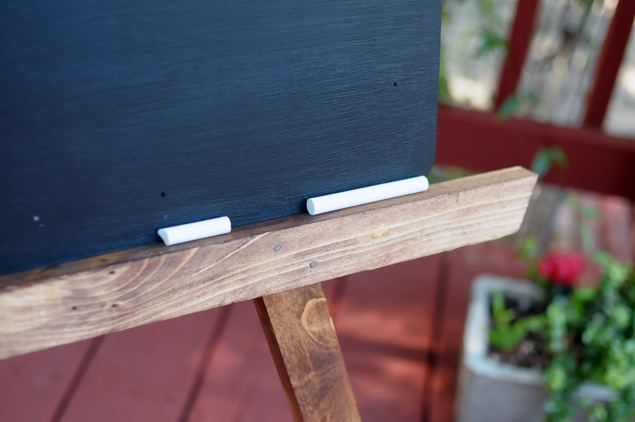
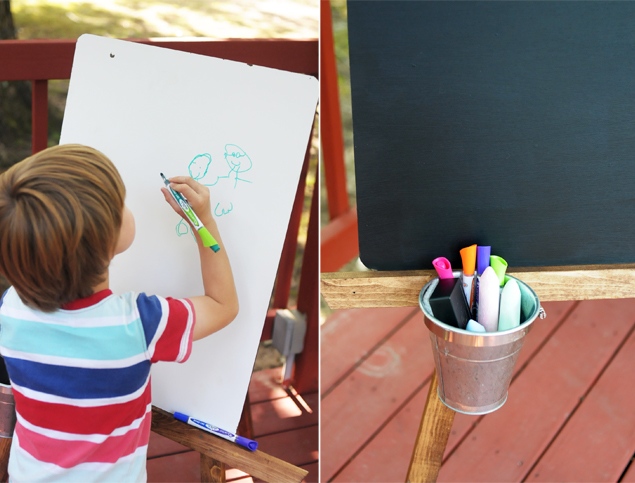
Your easel is now ready to use! Or if you'd like you could paint or stain it like we did. We also added a hose clamp to attach a little Ikea pail so Toby could store his chalk, markers and erasers right on the easel. You could just as easily use a can or jar from your pantry. 
DIY Kids' Art Easel - Kaelah Bee
easel8
DIY Kids' Art Easel - Kaelah Bee
At the end of the day we're really pleased with the outcome and Toby loves it more than anything. He wakes up in the morning and instantly starts doodling away before he gets ready for school. We spent about one hour or less whipping this up and we spent well under $30 (in fact I think we only paid $15 or so since we had a few pieces laying around the house). I know many of my readers are elementary teachers or moms, so hopefully you've found it as fun as we did! If you end up making one yourself, I'd love to see the outcome! Happy Tuesday!