When mulling over what topic I would choose for my second
Photoshop Elements tutorial as an Ambassador, I was torn between something with a "Wow!" aesthetic factor and something at little more subtle, yet totally life-changing. Bloggers tend to be very visual people and I wanted to deliver on that but when I thought about how much time and energy Automate/Batch has saved me, I knew it was the winner. It may not be the most visually captivating tool in
Photoshop Elements, but I promise it'll leave you saying "Wow!" for a completely different reason!
If you take outfit photos, product shots, or even photos on vacation, you know how easily hundreds of photos pile up. You make sure to shoot at a high resolution (or even in Camera RAW) so you can print them at a later date, but those huge file sizes aren't exactly browser/internet friendly. Maybe you have so many photos flying from your camera to your computer at one time that you're afraid the different batches will get mixed up and you'll be left with a giant mess on your hands. Enter Batch Edit!
Did you know you can resize, edit, rename, watermark
and organize an entire set of photos (tens! hundreds! tons!) with
just one click?! Okay, so maybe
one click is a little exaggerative, but just check this out below. Seriously, it's so insanely easy and you'll be thanking
Adobe later!
The first thing you want to do is put all of the photos you want organized or edited together in a single folder. The raw, straight-from-camera versions are fine. Just drag and drop them into a new folder all their own and name it whatever you wish. All of my images are titled something like "DSC_0101" when I copy them over. Batch Edit will allow you to name them all the same thing so don't stress!
This next step is optional, but it'll help give you a first-hand account on how your document's dimensions work.
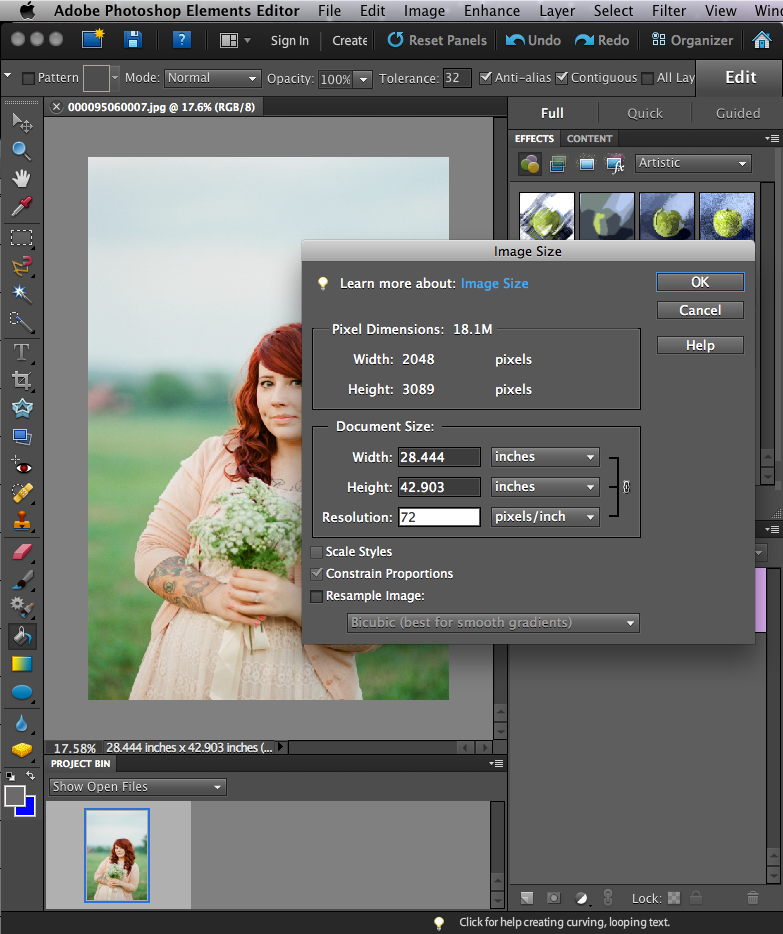
Once you have your images, whether 5 or 500, in one folder, open one of them in Photoshop Elements and click Image --> Resize --> Image Size to get an idea of how large your photos are. Below is a screenshot of my original file. It's currently 18.1M which is
insanely too large to be putting online. At this size my photo would take an eternity to load and could potentially crash a reader's browser! The main things to take note of are: Pixel dimension, document size and resolution.

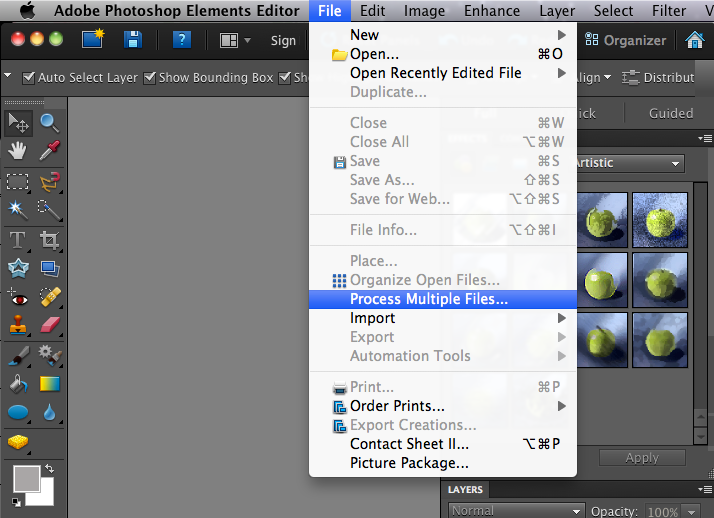
Now to get started on the real batch editing! After loading all of your images into one folder, click File --> Process Multiple Files... to begin the process. A charcoal prompt box will appear. Don't be intimidated by the buttons and choices! I've detailed what they all do below! You do not have to do all of these at once! Or at all! I'm only showing you the screenshots to help explain what is possible in Elements! Don't let all of the boxes scare you! I promise it's a simple 2-click, 30 second task!
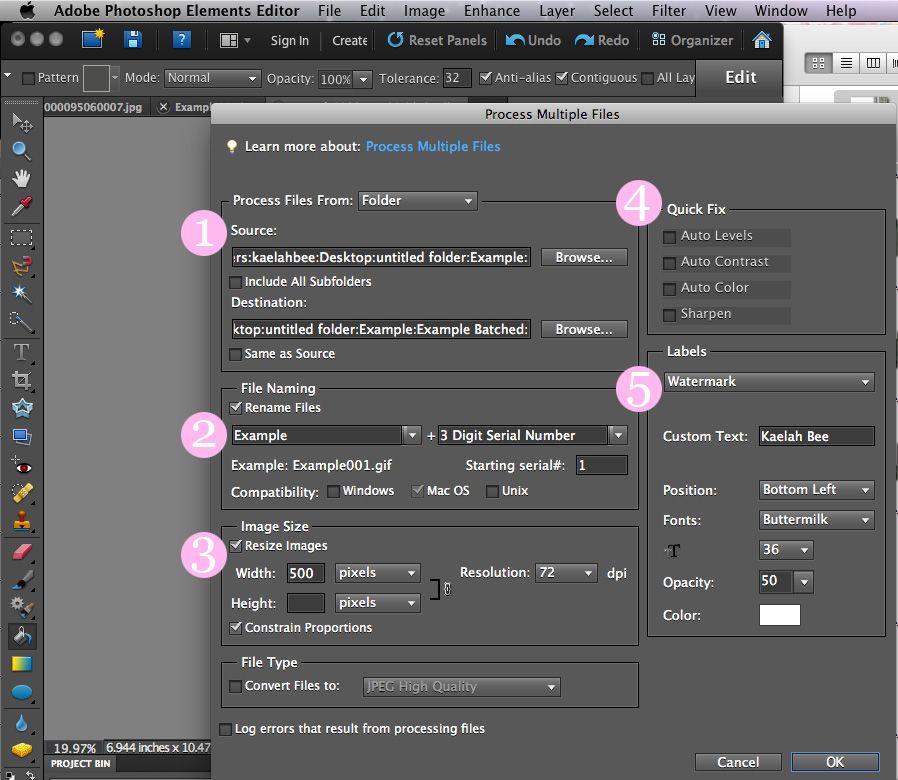
A quick and generalized run-down of the Batch prompt:
1. Source and Destination folders: Choose "Browse" to find the folder with all of the original photos you accumulated. If you want to keep them super organized and separated, create an additional folder (empty!) to save the new files into. This helps keep your original image intact in case you want the hi-res version later!
2. File Naming: This comes in so handy if you like to organize your files by name. I label each outfit under a new name, but as a set. You can also name them according to place, date, or product depending on what it is you're working on. (Pro-tip: The file name of your image actually helps Google catalog them in the search engine! Try naming your photos with something specific and this will in-turn help with your page rank and traffic!)
3. Image Size: This is a big one no matter who you are or what you're using your photos for! File size can bog down your blog's loading time and can even crash a reader's browser! Be kind and make sure to properly size your images so there's no lag. The content area of my blog fits 500 pixel images so I've deemed that a great size for my photos. Notice that I leave the height box blank and click "Constrain Proportions" so that Elements sizes it for me. I also make sure the resolution is 72 dpi.
4. Quick Fix: This is a great way to give your photos some extra "oomph!" without even trying. If all of your photos were taken in low or weird light, or you just want to beef up the contrast some, click some of these boxes so Elements can quickly make those adjustments for you! Generally speaking Elements does a really great job of determining what your photos need and how to quickly fix them up.
5. Labels: If you're a blogger, photographer, or indie biz owner, the watermark feature could be the difference thousands upon thousands of hits to your site or someone stealing your photo and claiming it as their own. We live in a time where intellectual property theft is at an all time high and it's super easy to do. Protect your photos by doing a watermark with your name and/or site URL on the photo. That way if it all of a sudden goes viral on Tumblr or Pinterest, you'll still get credit no matter what!
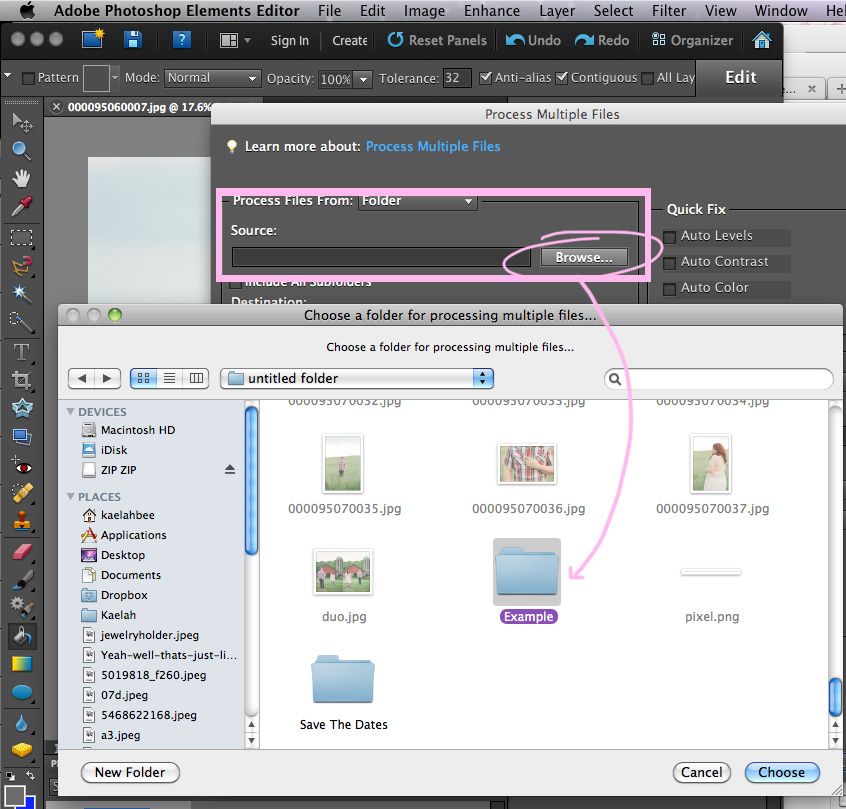
Now that you know what everything does, browse your computer's harddrive, locate the source folder, and determine where you want the edited files to end up. It's also time to decide how large you what your images to be, and if you'd like the edited or watermarked. Once you've made all of those decisions just hit "Ok"...

That's that! Elements will now open, batch edit, and close each and every one of your images from the source folder. Give your computer some time to do this. Busy yourself with another task while it works. It can take as little as a few seconds or several minutes depending on how many images you decided to edit.
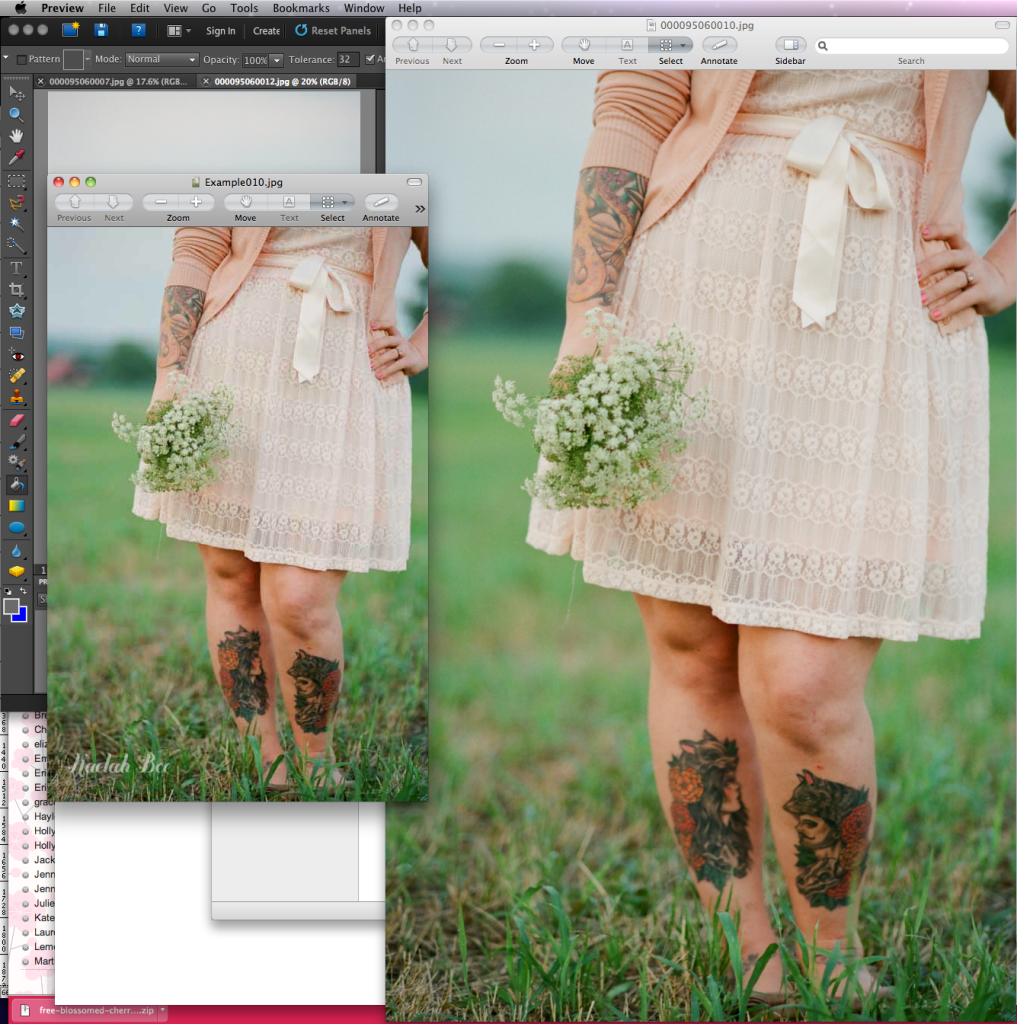

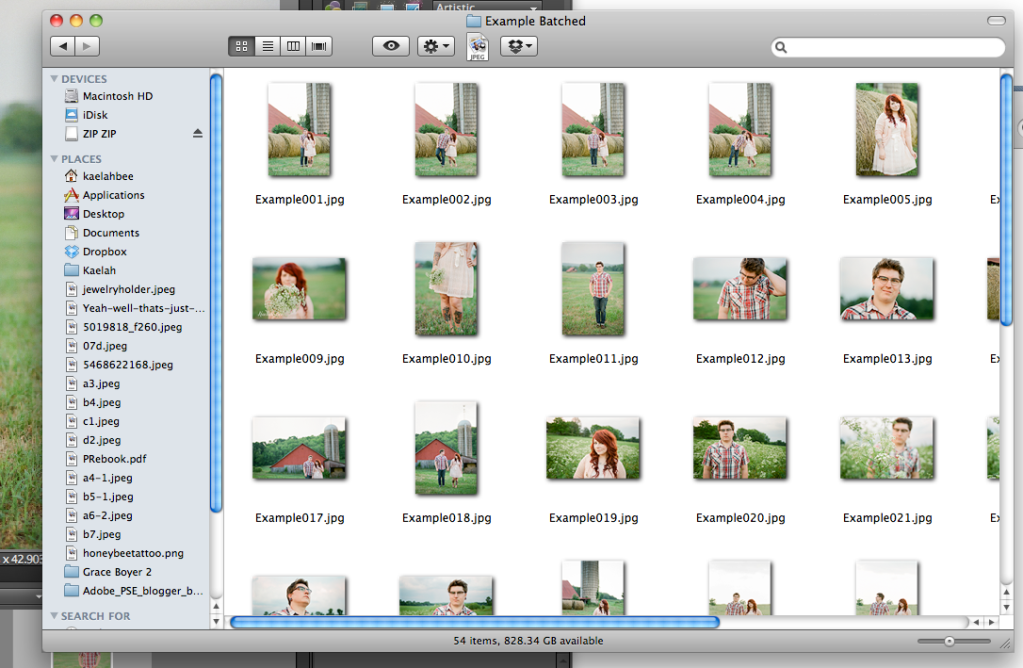

Once Elements has completed your batch edit, open your Destination folder and check out the files all in a row! I named mine "Example" for example's sake (so creative!) and you can see them all in order. Two images up you can see the edited file next to the original. The edited file is much smaller and dons a little watermark with my name. It may not look like a big deal now, but your readers (and the internet in general!) will thank you for the small sized images and quicker loading time. At the end of the day it's your readers' experience that truly matters! Quick loading images and zero lag will keep them coming back day after day!
As a blogger, photographer, and online shop owner, the Batch tool is life-saving. If certain photos need more in-depth tuning, I can open them up and give them more individualized attention. But for the most part all they need is a punch of contrast, a smaller package size, a sequenced name for easy filing and sometimes a watermark for security. It's pretty amazing that one little tool can do all of that for me.
Are you a batch-tool user? Think it could help you in your online life? Let me know! I hope my tutorial was informative and easy to follow.



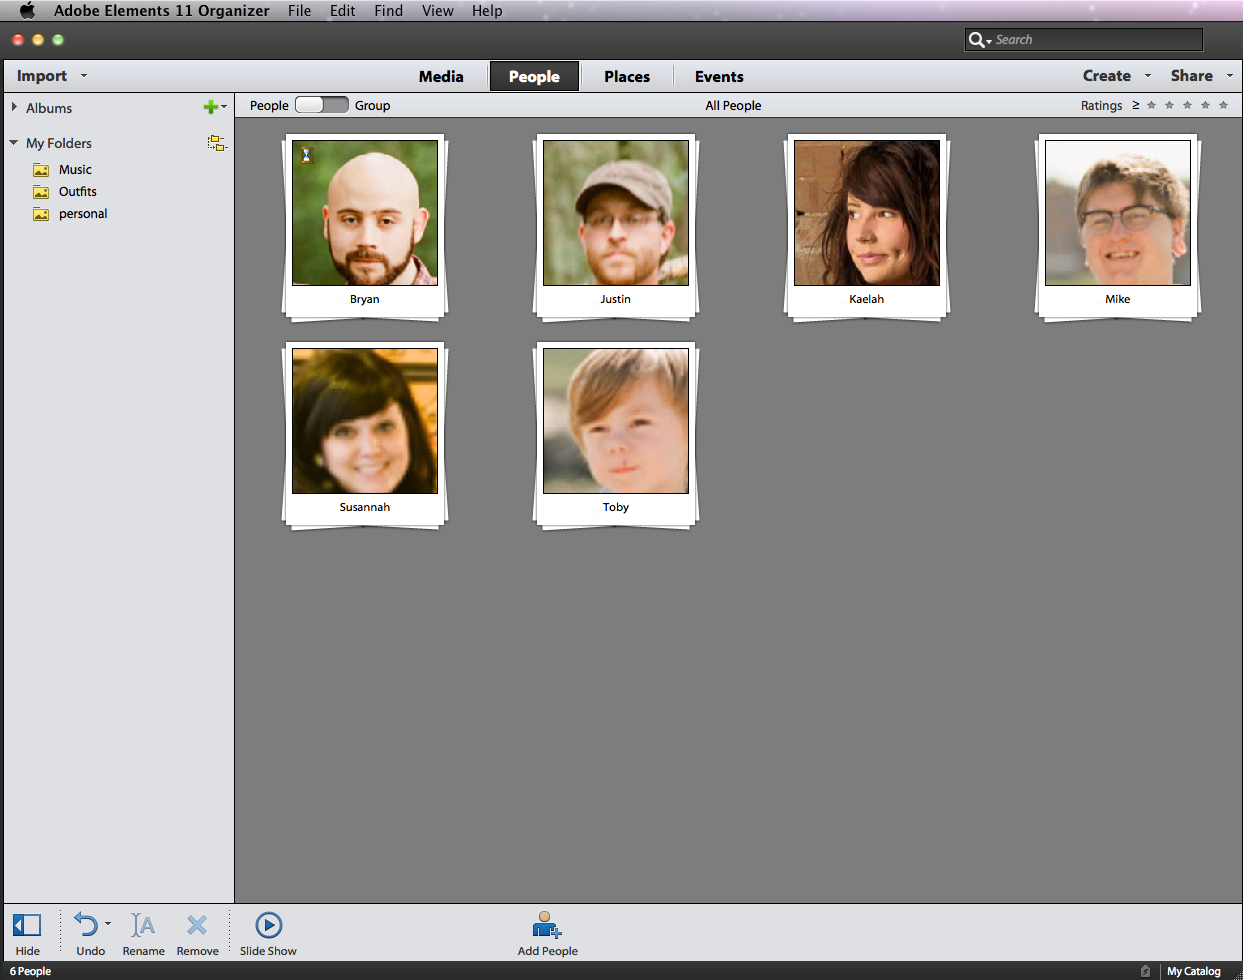
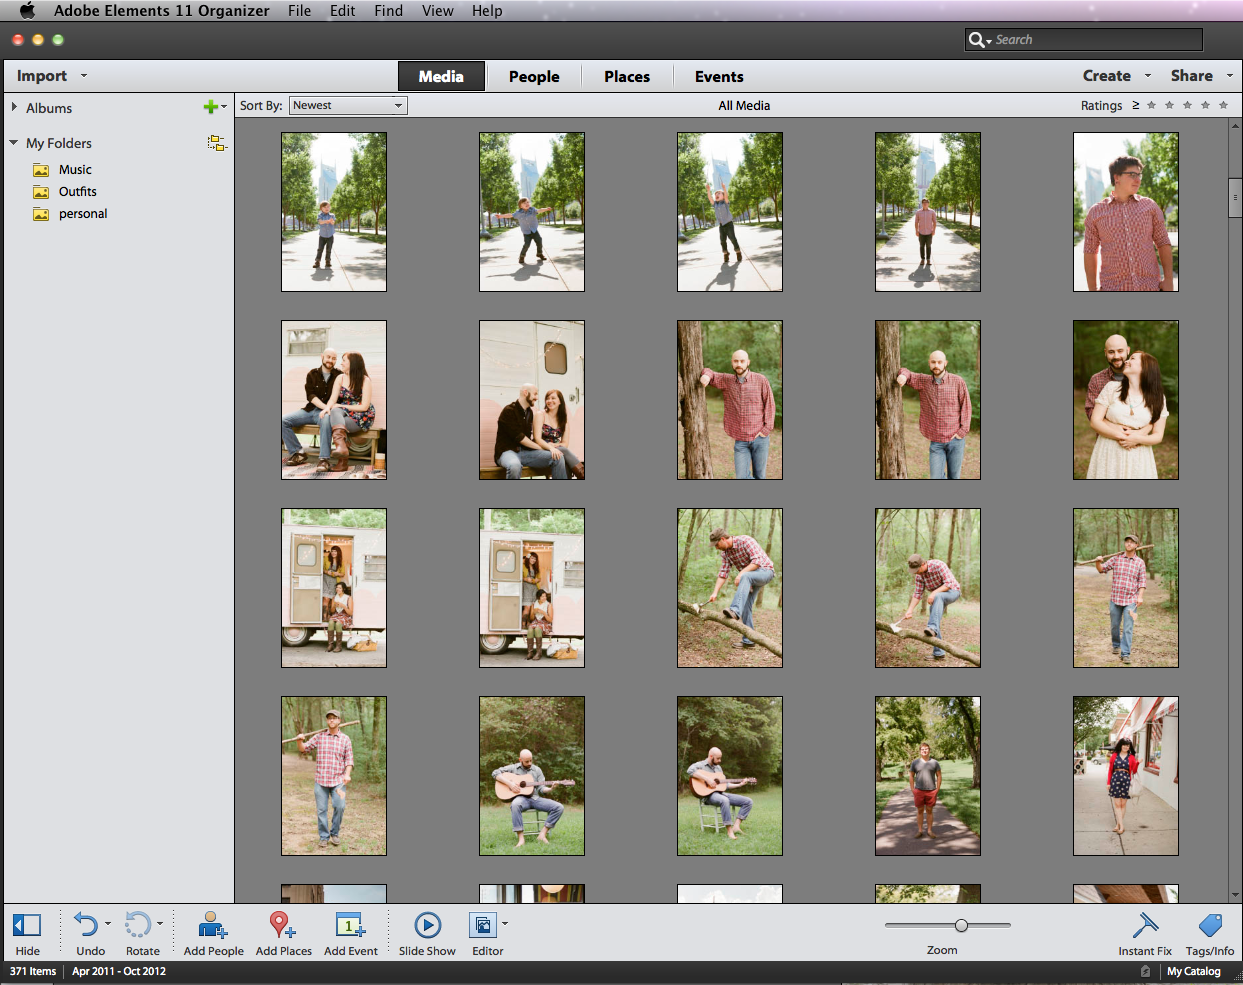 The Elements Organizer (and program!) have been revamped with a sleek, shinier new interface that allows quick and easy access to the software's most used features. The Organizer has a feature where you can scan your images and put them in folders of individuals! You can also group your photos by date, geographic location, and events. As a serial folder-stacker on my computer (and someone who never liked iPhoto), this was a huge improvement! Well on my way to being organized!